
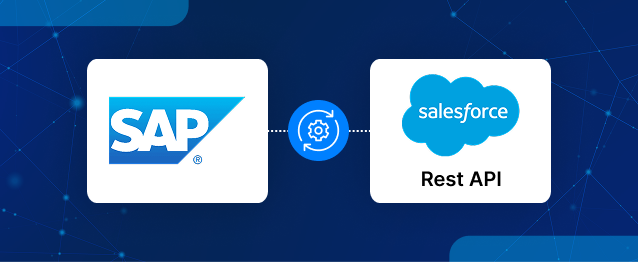
Integrating SAP applications with Salesforce enhances alignment of customer data and business processes. Utilizing SAP Business Technology Platform (BTP) and the SAP Integration Suite, businesses can connect these platforms seamlessly. This guide details the process of setting up the integration, including creating accounts, configuring OAuth settings, and developing an Apex REST API in Salesforce. It covers the creation of an integration flow to facilitate Lead record creation, along with testing the integration using Postman to ensure functionality.
Connecting SAP applications with Salesforce can help businesses keep customer information and business processes aligned across both platforms. SAP Business Technology Platform (SAP BTP) provides an integration layer for exchanging data between these systems without building a separate connection for every application.
In this example, SAP Integration Suite acts as middleware and sends JSON data to a custom Apex endpoint in Salesforce. The endpoint receives the request and creates Lead records, while OAuth 2.0 Client Credentials handles authentication between the platforms.
This guide walks through the complete Salesforce REST API Integration, from setting up SAP BTP and configuring Salesforce authentication to creating an integration flow (iFlow) and testing it with Postman. The example focuses on Lead creation, but the same approach can be extended to other business objects with the required changes.
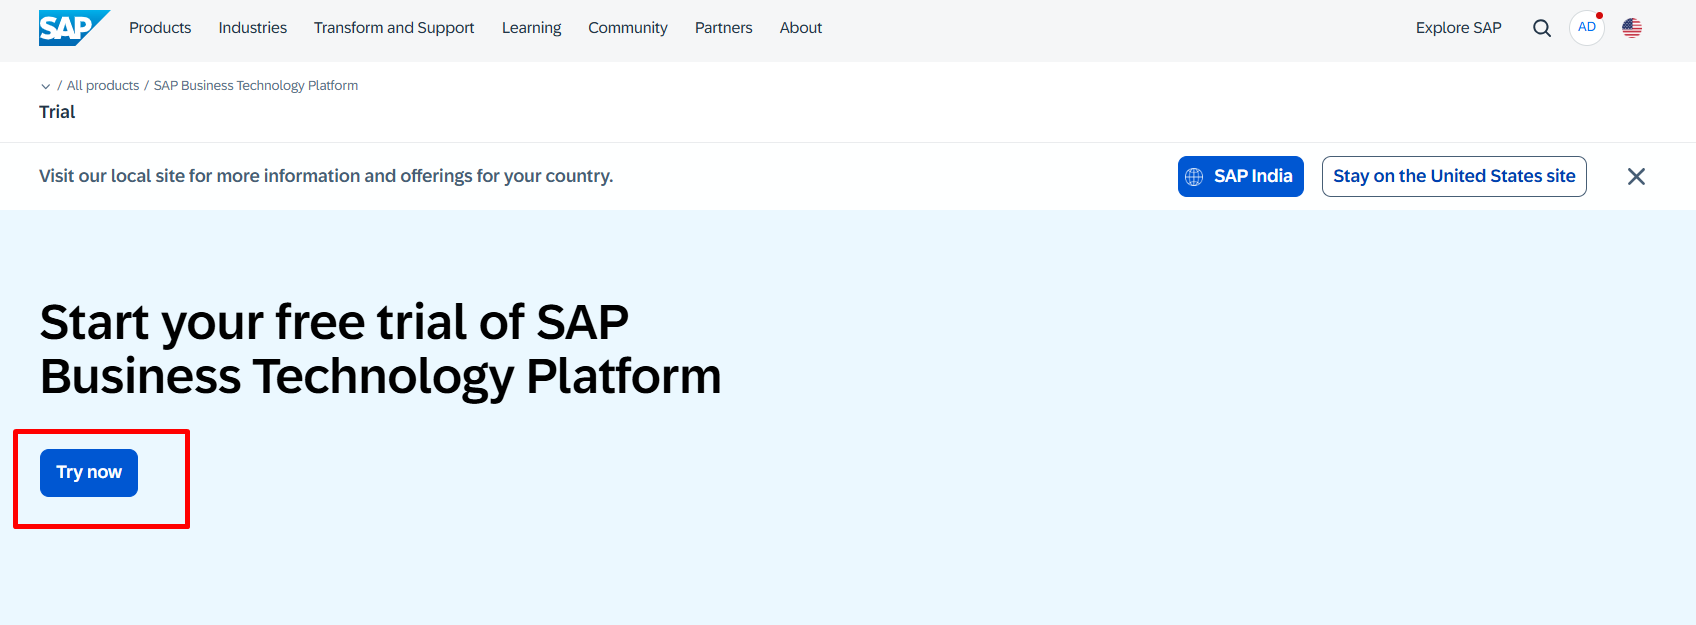
Step 1: Create an SAP Integration Suite Account
Start by opening the SAP Integration Suite page.
- Enter the External Client App Name.
- Enter the Contact Email.
- Enable OAuth Settings and configure the following:
- Callback URL: https://your-domain.my.salesforce.com/services/oauth2/token
- OAuth Scopes:
- Manage user data via APIs (api)
- Full access (full)
- Perform requests at any time (refresh_token, offline_access)
- Enable the Client Credentials Flow checkbox.
- Click Save.
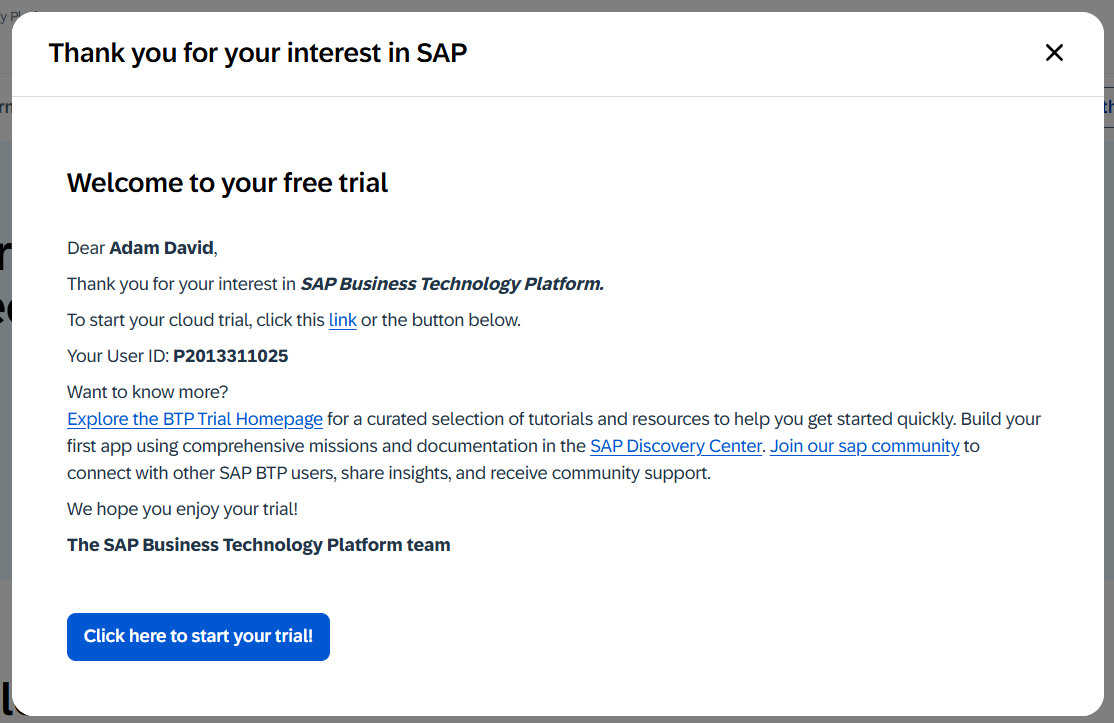
Step 2: Create an SAP BTP Trial Account
Once your SAP account is ready, open the SAP BTP trial page.
- Open the External Client App you created.
- Go to Policies or Edit Policies, depending on the interface.
- Locate the OAuth Client Credentials Flow settings.
- Enable the flow if it is not already enabled.
- Select the appropriate Salesforce integration user under Run As.
- Save the changes.
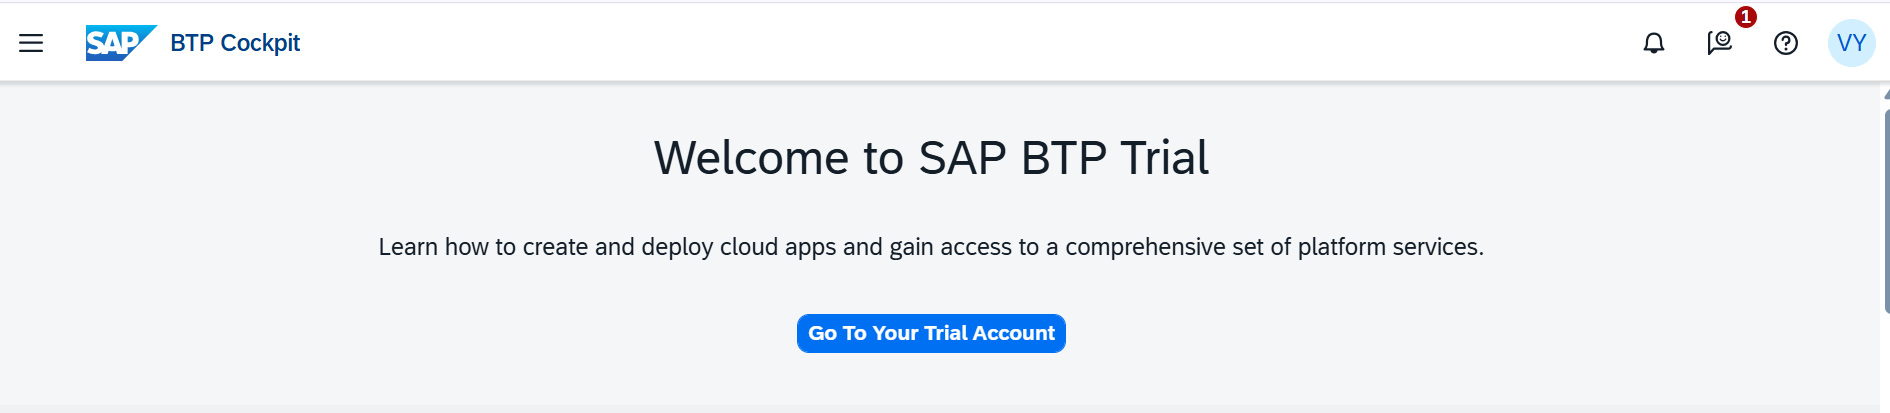
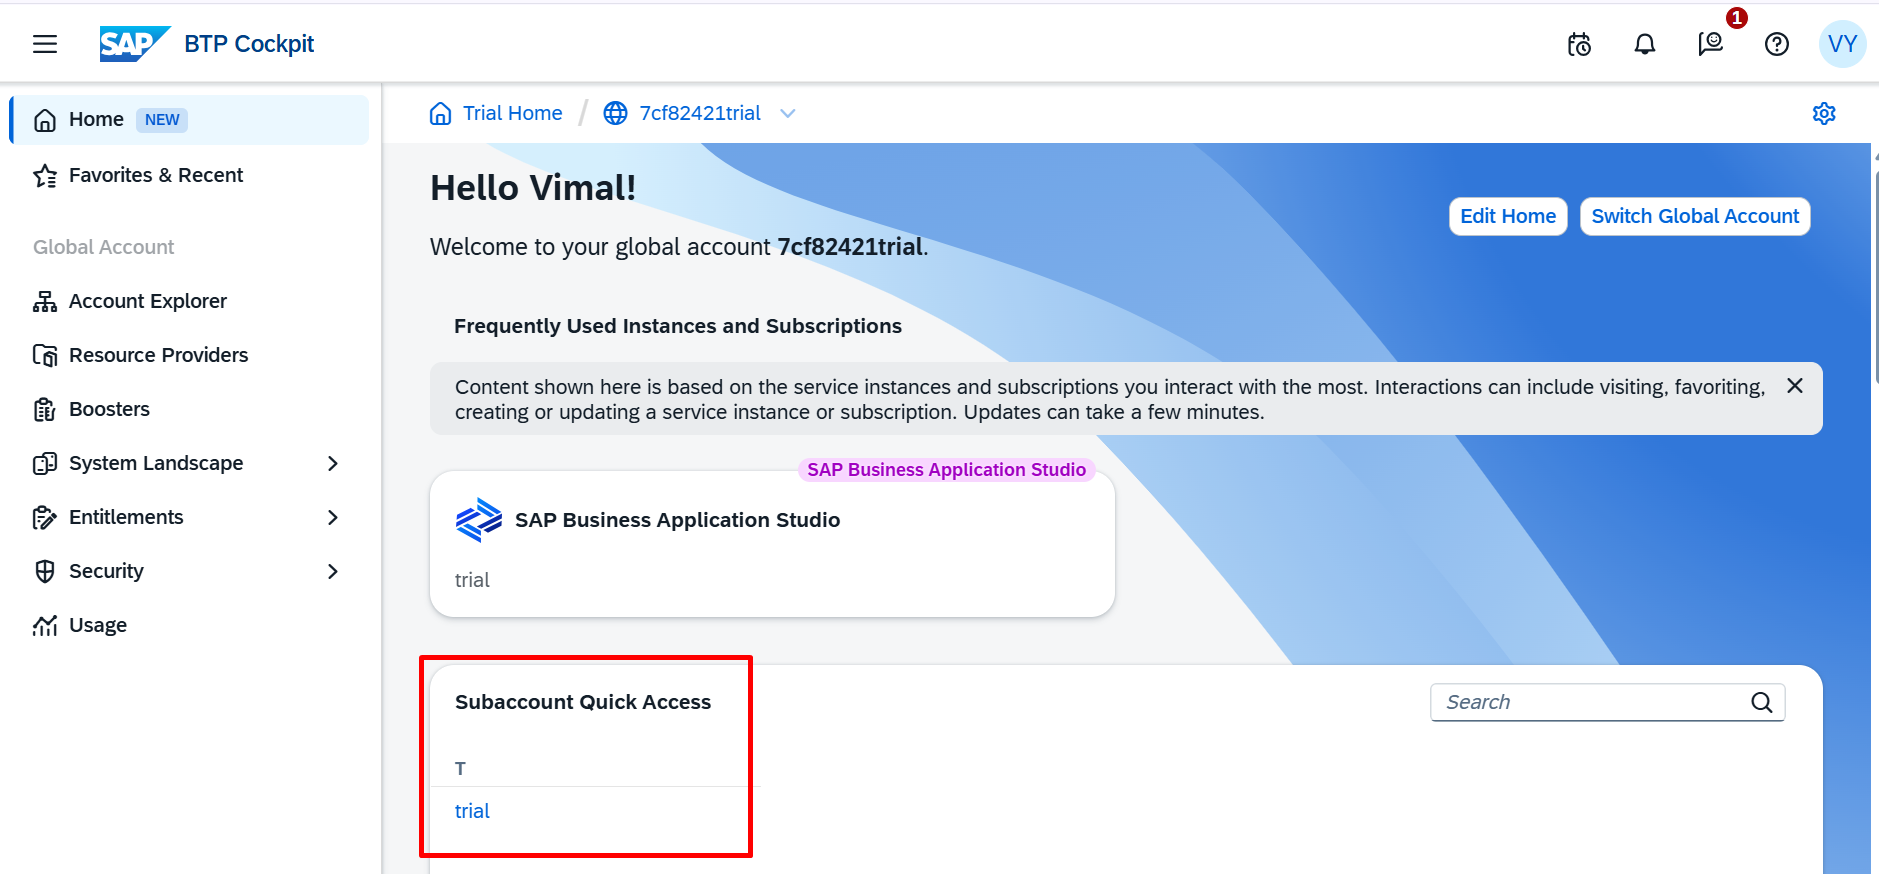
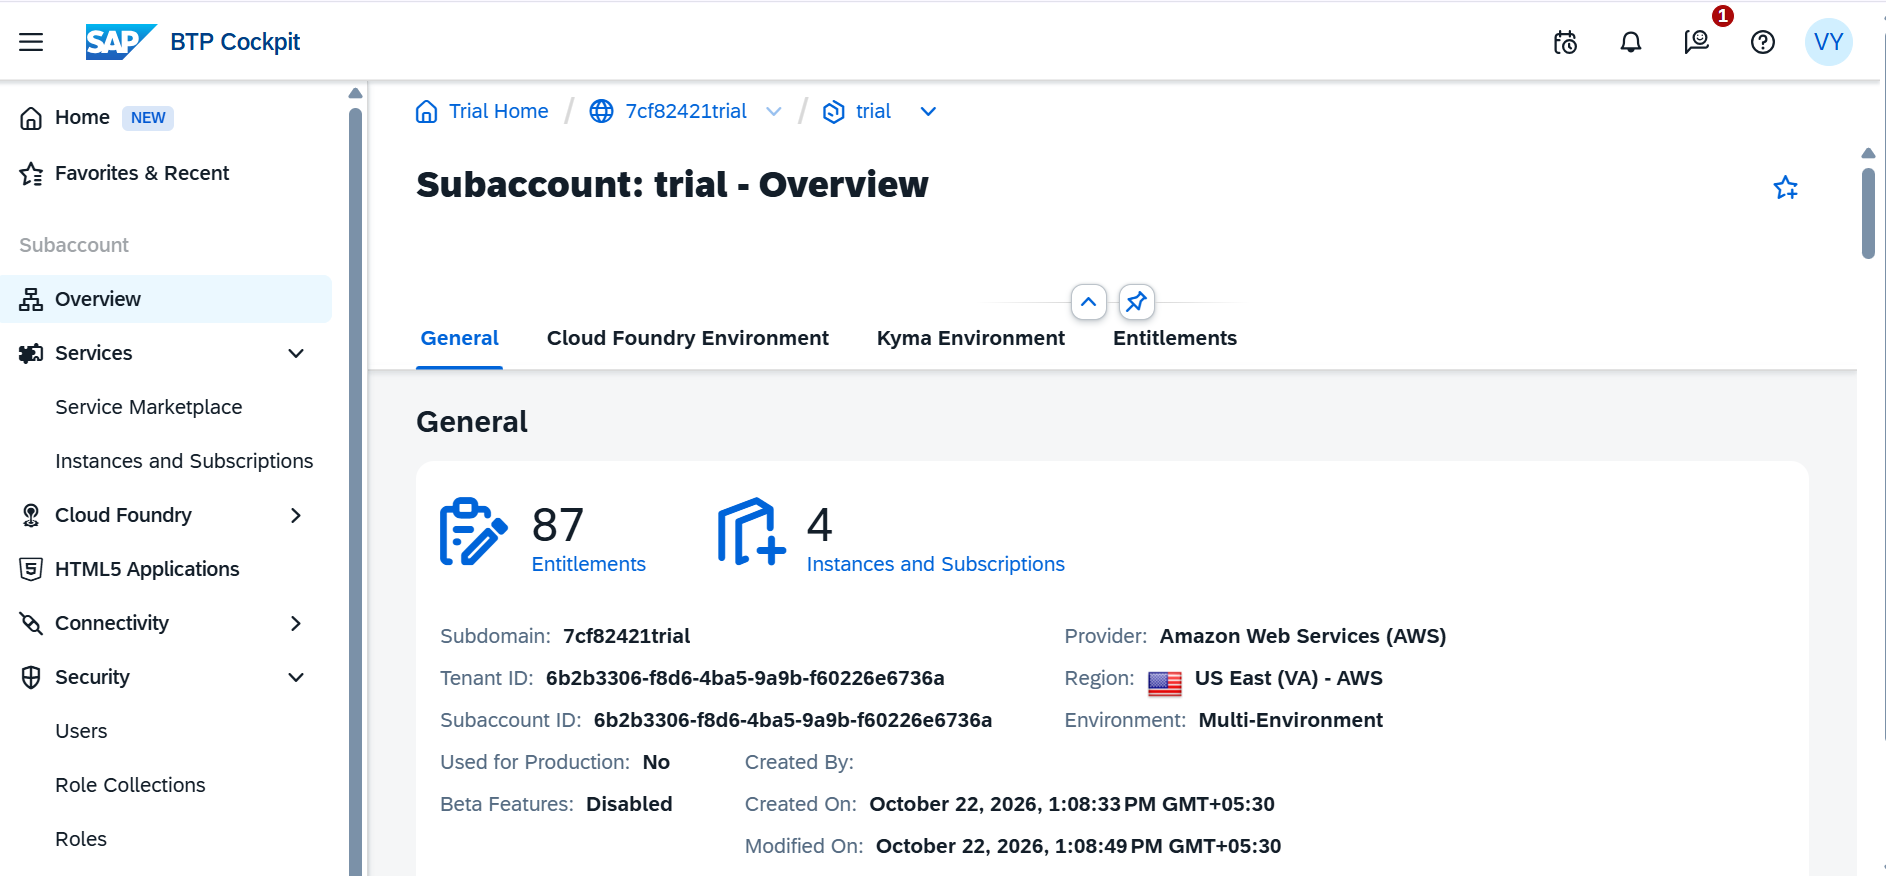
You should now be able to access your SAP BTP subaccount and continue with the Integration Suite setup.
Step 3: Create an External Client App in Salesforce
Salesforce needs an OAuth application to authenticate requests coming from SAP BTP. For this example, configure an External Client App with the Client Credentials flow.
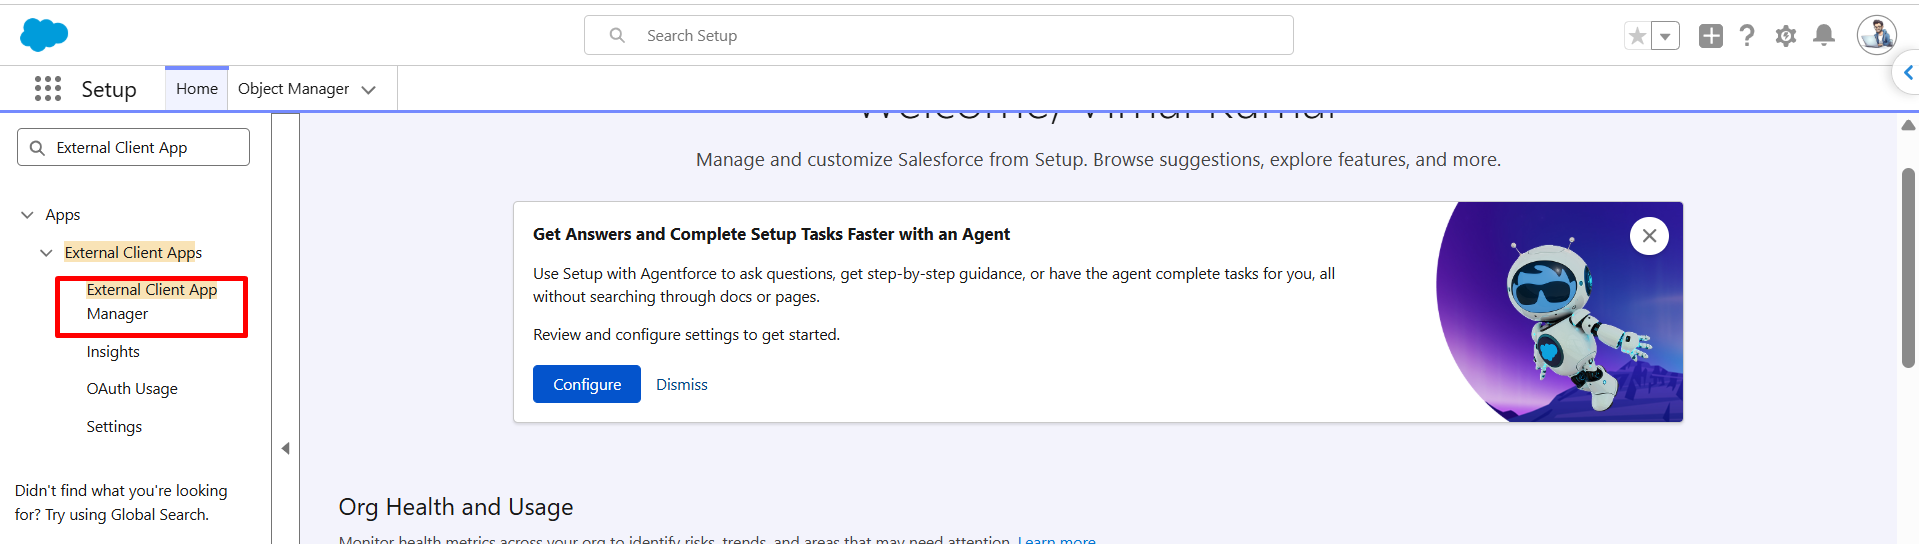
- Log in to your Salesforce Developer Account.
- Click the Setup (gear) icon.
- In the Quick Find search box, enter External Client Apps.
- Open External Client App Manager or the External Client App creation option available in your org.
- Select the option to create a new External Client App.
Step 4: Configure the External Client App
Enter the basic application details:
- Enter the External Client App Name.
- Enter the Contact Email.
- Enable OAuth Settings and configure the following:
- Callback URL: https://your-domain.my.salesforce.com/services/oauth2/token
- OAuth Scopes:
- Manage user data via APIs (api)
- Full access (full)
- Perform requests at any time (refresh_token, offline_access)
- Enable the Client Credentials Flow checkbox.
- Click Save.
Step 5: Configure Salesforce OAuth Policies
The Client Credentials flow requires Salesforce to know which user should execute API requests.
- Open the External Client App you created.
- Go to Policies or Edit Policies, depending on the interface.
- Locate the OAuth Client Credentials Flow settings.
- Enable the flow if it is not already enabled.
- Select the appropriate Salesforce integration user under Run As.
- Save the changes.
The selected user must have API access and the required permissions to create Lead records. It is better to use a dedicated integration user with limited permissions instead of a personal administrator account.
Once the app is configured, retrieve its Consumer Key and Consumer Secret. You will need both values when setting up the OAuth credentials in SAP BTP.
Step 6: Create the Salesforce Apex REST API
In Salesforce Setup or Developer Console, create and deploy an Apex REST class. The endpoint path in this example is `/services/apexrest/SAPLeadAPI/`. The API accepts a JSON array of Lead records and inserts them.
Step 7: Create the SAP Integration Suite Service Subscription
Now move to your SAP BTP subaccount to set up Integration Suite.
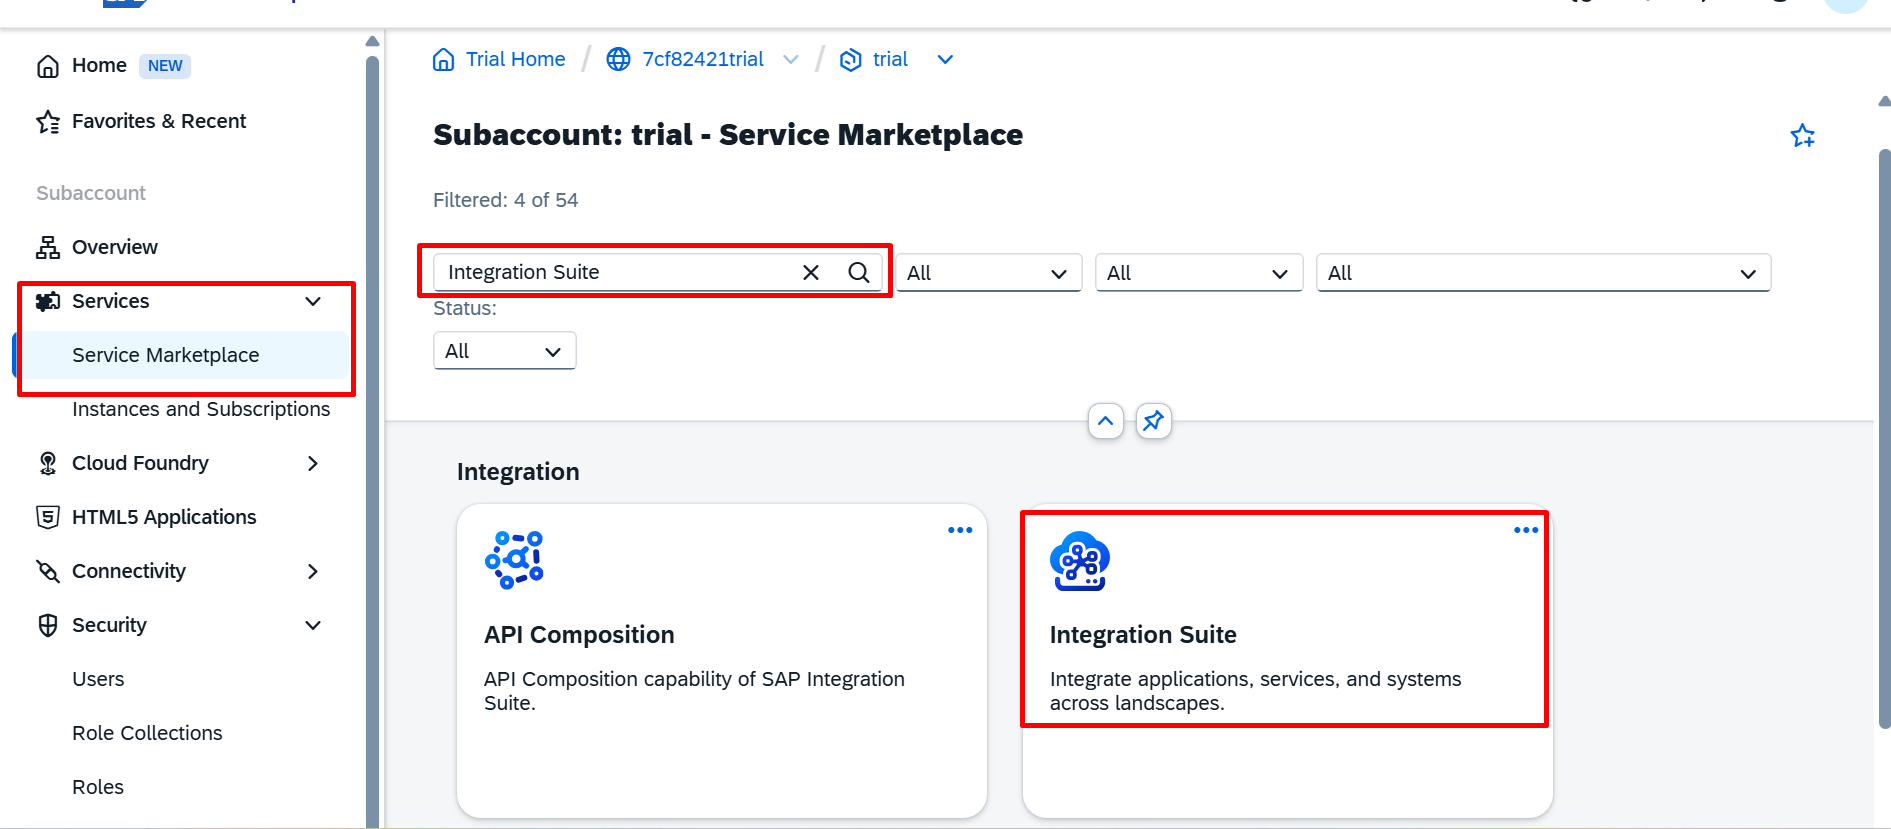
- Open your SAP BTP Subaccount.
- Select Service Marketplace from the left-side menu.
- Search for Integration Suite.
- Open the service and select the available trial plan.
- Click Create to create the service subscription.
- Open Instances and Subscriptions.
- Under Subscriptions, verify that Integration Suite appears.
The subscription makes the service available in your subaccount. You may need to assign the required role collections before opening and configuring it.
Step 8: Assign Role Collections to Subaccount Users
SAP BTP uses role collections to control access to Integration Suite capabilities.
- Open your SAP BTP Subaccount.
- Under Security, select Users.
- Select the user who will configure the integration.
- Click Assign Role Collection.
- Search for the required role collections and assign the ones applicable to your subscription and activated capabilities.
- Save the changes and verify the assigned roles.
The role collections in your supplied setup include:
- APIManagement.SelfService.Administrator
- APIPortal.Administrator
- APIPortal.Service.CatalogIntegration
- Integration_Provisioner
- OpenConnectors_User
- PI_Administrator
- PI_Business_Expert
- PI_Integration_Developer
- Subaccount Administrator
You do not necessarily need every role collection for every integration. Assign the permissions required for the capabilities you intend to use, following your organisation’s access policies.
Step 9: Open SAP Integration Suite
After assigning the required roles:
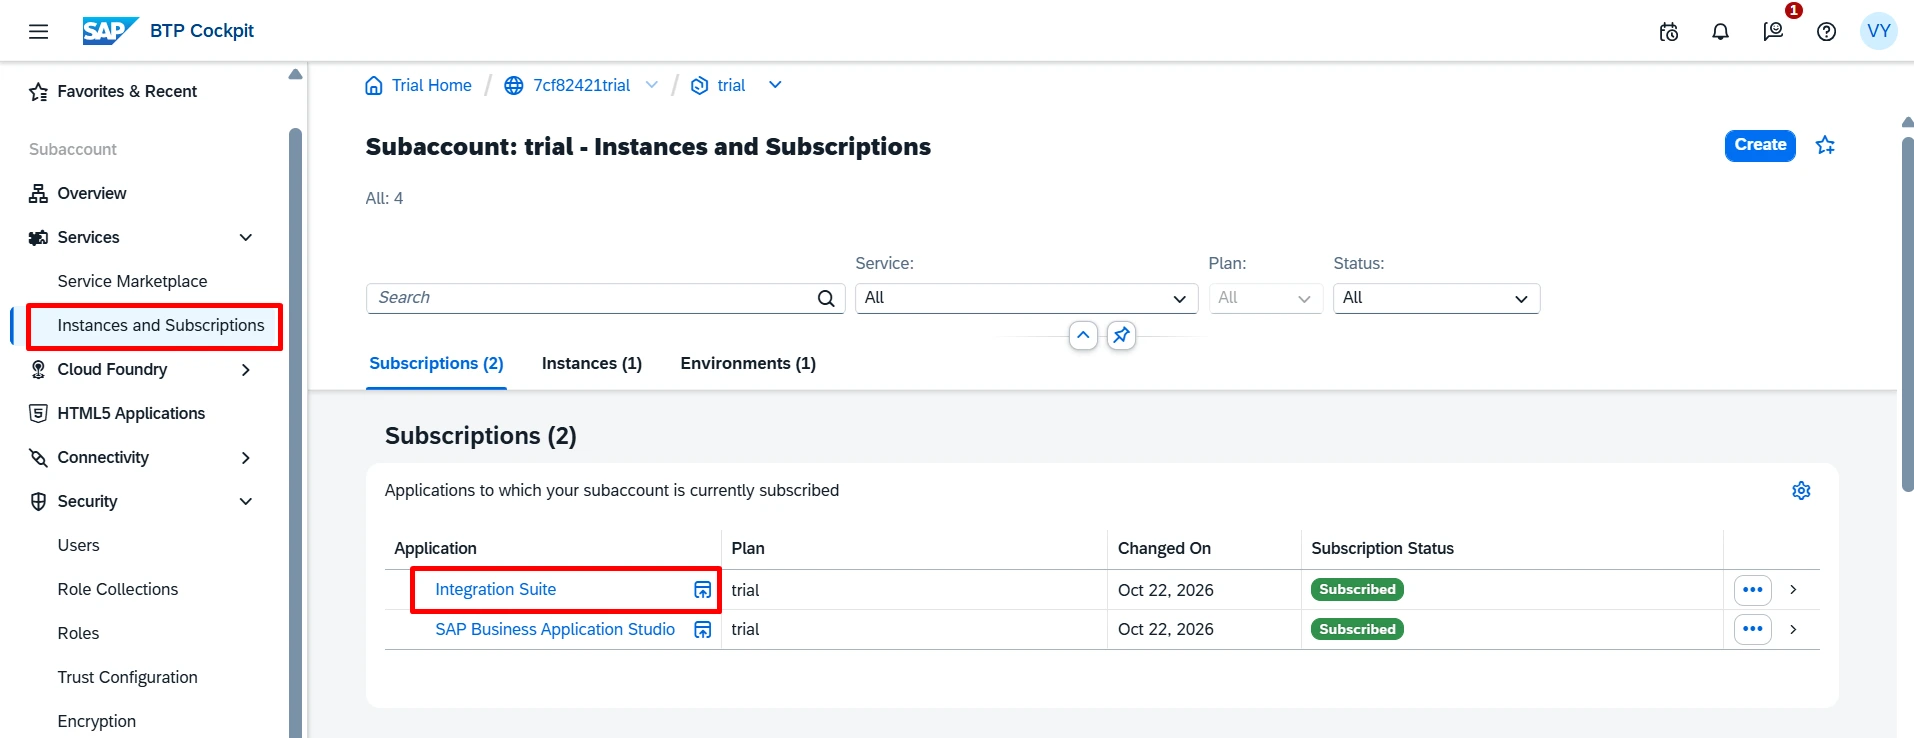
- In the SAP BTP Subaccount, open Services → Instances and Subscriptions.
- Under Subscriptions, locate Integration Suite.
- Click the service to open it.
Step 10: Add and Activate Integration Suite Capabilities
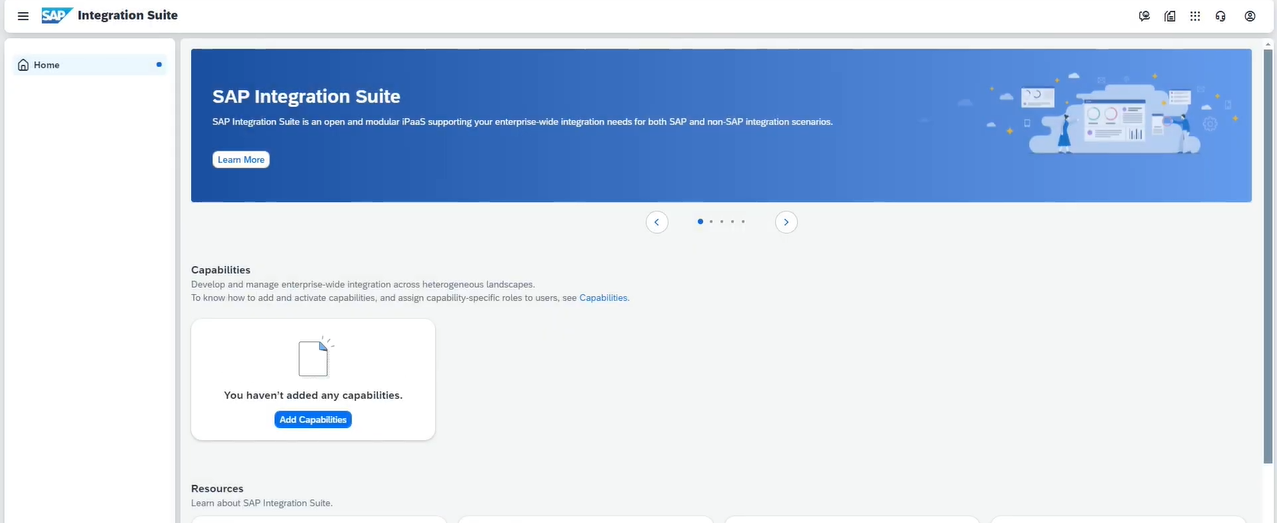
Integration Suite provides different capabilities, including Cloud Integration and API Management. For this example, Cloud Integration is required to build and run the iFlow.
- On the Integration Suite home screen, click Add Capabilities.
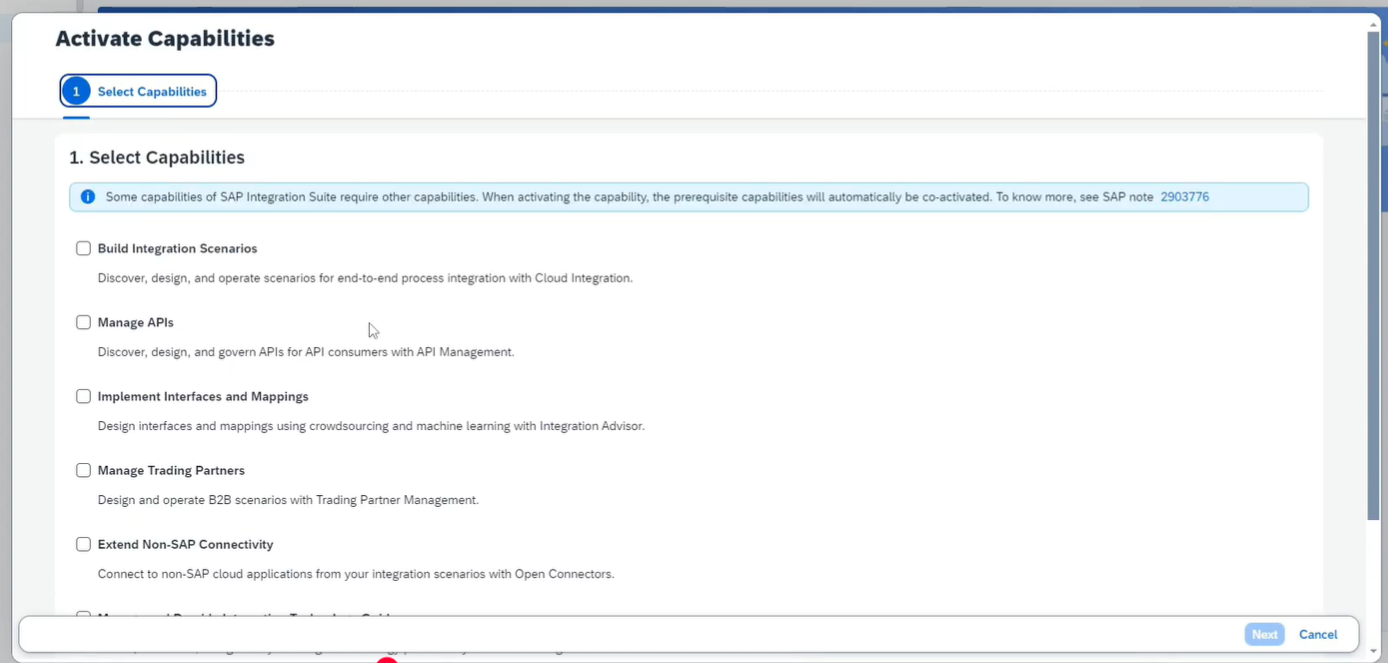
- Select Cloud Integration.
- Select the capabilities required for your setup.
- For this example, select Cloud Integration and API Management if both are available and needed.
- Click Activate.
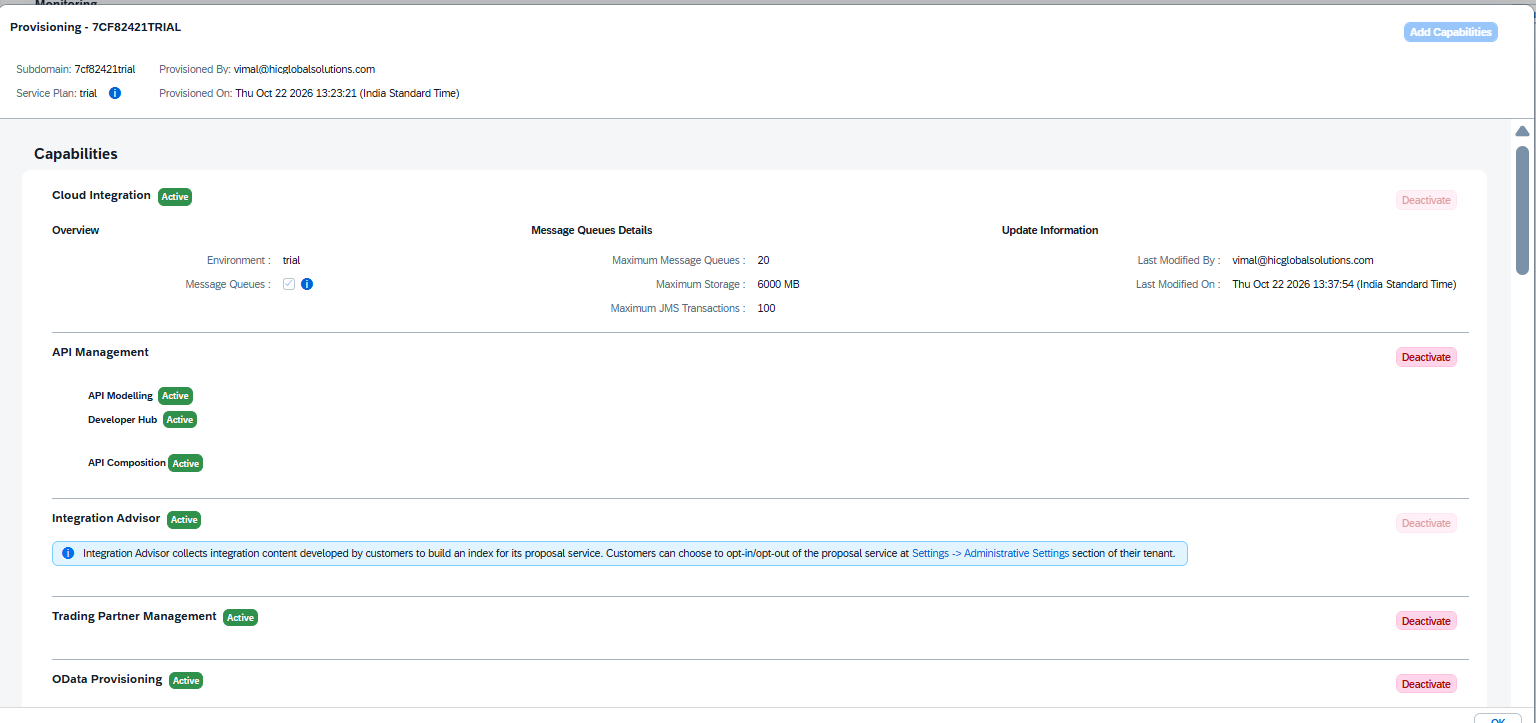
- Wait for the activation process to finish.
- Reopen SAP Integration Suite and verify that the selected capabilities are available.
Activation can take several minutes. The time may vary depending on the trial environment.
Step 11: Configure Salesforce OAuth Credentials in SAP BTP
SAP Integration Suite needs the Salesforce Consumer Key and Consumer Secret to obtain an access token.
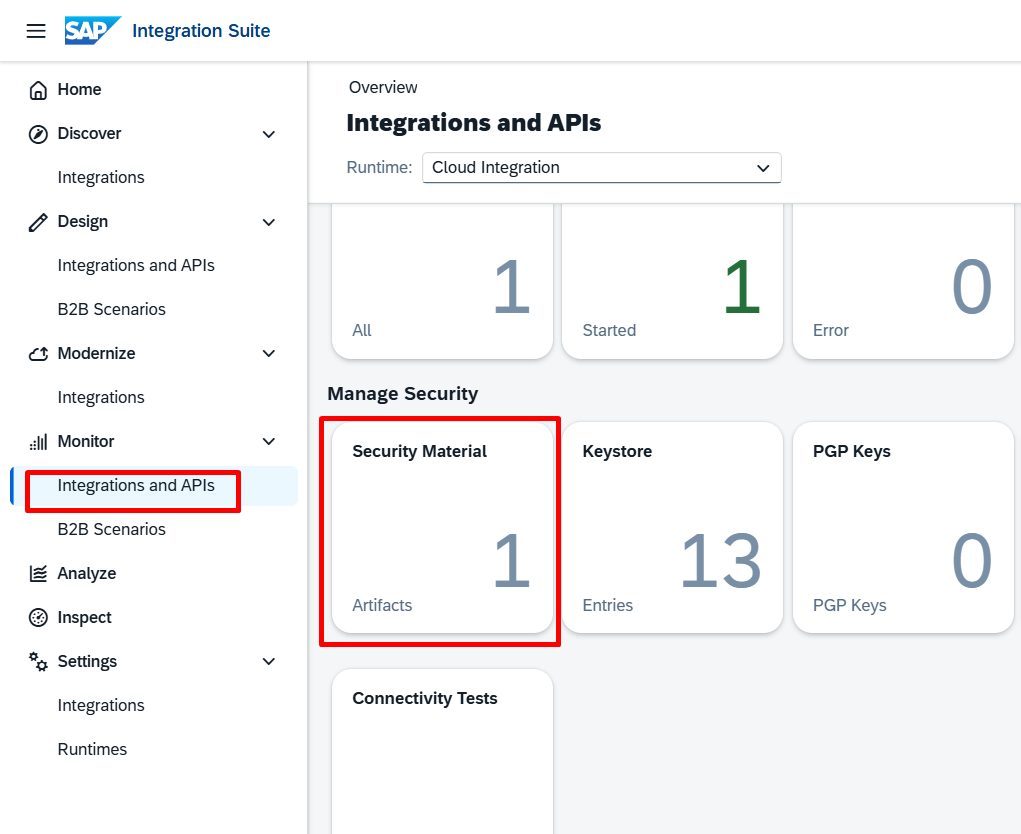
- In SAP Integration Suite, open the Monitor section.
- Select Integrations and APIs.
- Scroll to Manage Security.
- Open Security Material.
- Click Create.
- Select OAuth2 Client Credentials.
Configure the following details:
| Field | Value |
|---|---|
| Name | Salesforce_OAuth_Cred |
| Runtimes | Cloud Integration and Integration cell |
| Token Service URL | https://<your-salesforce-domain>/services/oauth2/token |
| Grant Type | Send as part of body |
| Client ID | Salesforce External Client App Consumer Key |
| Client Secret | Salesforce External Client App Consumer Secret |
| Client Authentication | Send as Request Header |
| Content Type | application/x-www-form-urlencoded |
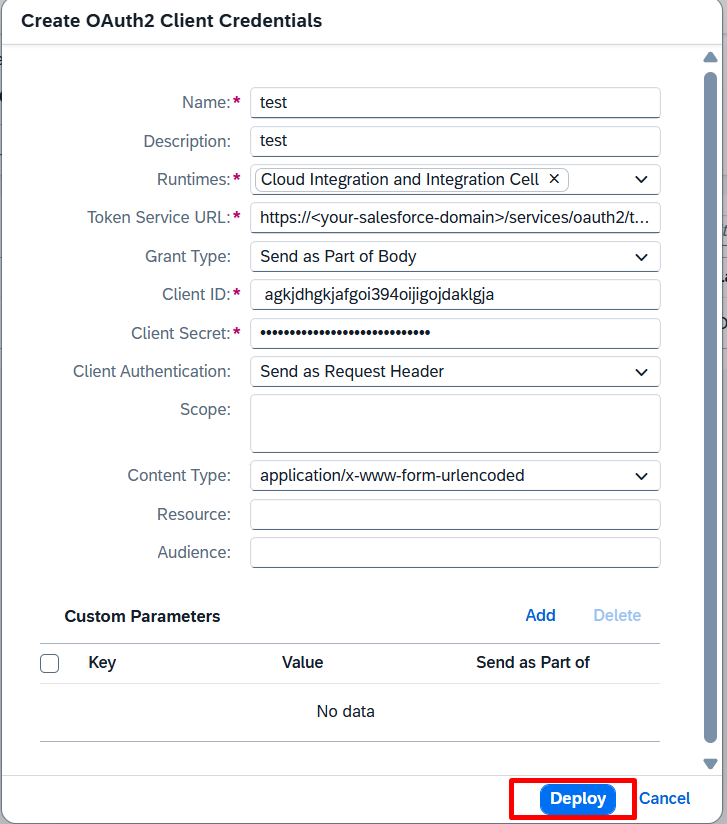
- Enter the required values and verify that the Salesforce token URL uses your org’s domain.
- Click Deploy or Save, depending on the options available in your SAP Integration Suite environment.
Step 12: Create an Integration Package
The integration package will contain the iFlow used to connect SAP BTP with Salesforce.
- In SAP Integration Suite, open the Design section.
- Select Integrations and APIs.
- Click Create.
- Enter the following details:
- Name: SAP To Salesforce Lead
- Technical Name: SAP_To_Salesforce_Lead
- Short Description: Integration flow to create Salesforce Leads using a REST API.
- Click Create to create the integration package.
Step 13: Create an Integration Flow (iFlow)
- Open the integration package you created.
- Go to the Artifacts tab.
- Click Add and select Integration Flow.
- Enter the following details:
- Name: SAP to Salesforce Lead
- ID: SAP_To_Salesforce_Lead
- Description: Integration flow to create Salesforce Lead records using a REST API.
- Click Add to create the integration flow.
- Open the newly created iFlow to start configuring the integration process.
Configure and Deploy the Integration Flow
The following steps connect the SAP BTP sender endpoint to the Salesforce Apex REST endpoint.
Step 1: Connect the Sender to the Integration Process
- Open your created integration flow in SAP Integration Suite.
- Locate the Sender participant on the left side of the canvas.
- Select the Sender participant and connect it to the Start Message event.
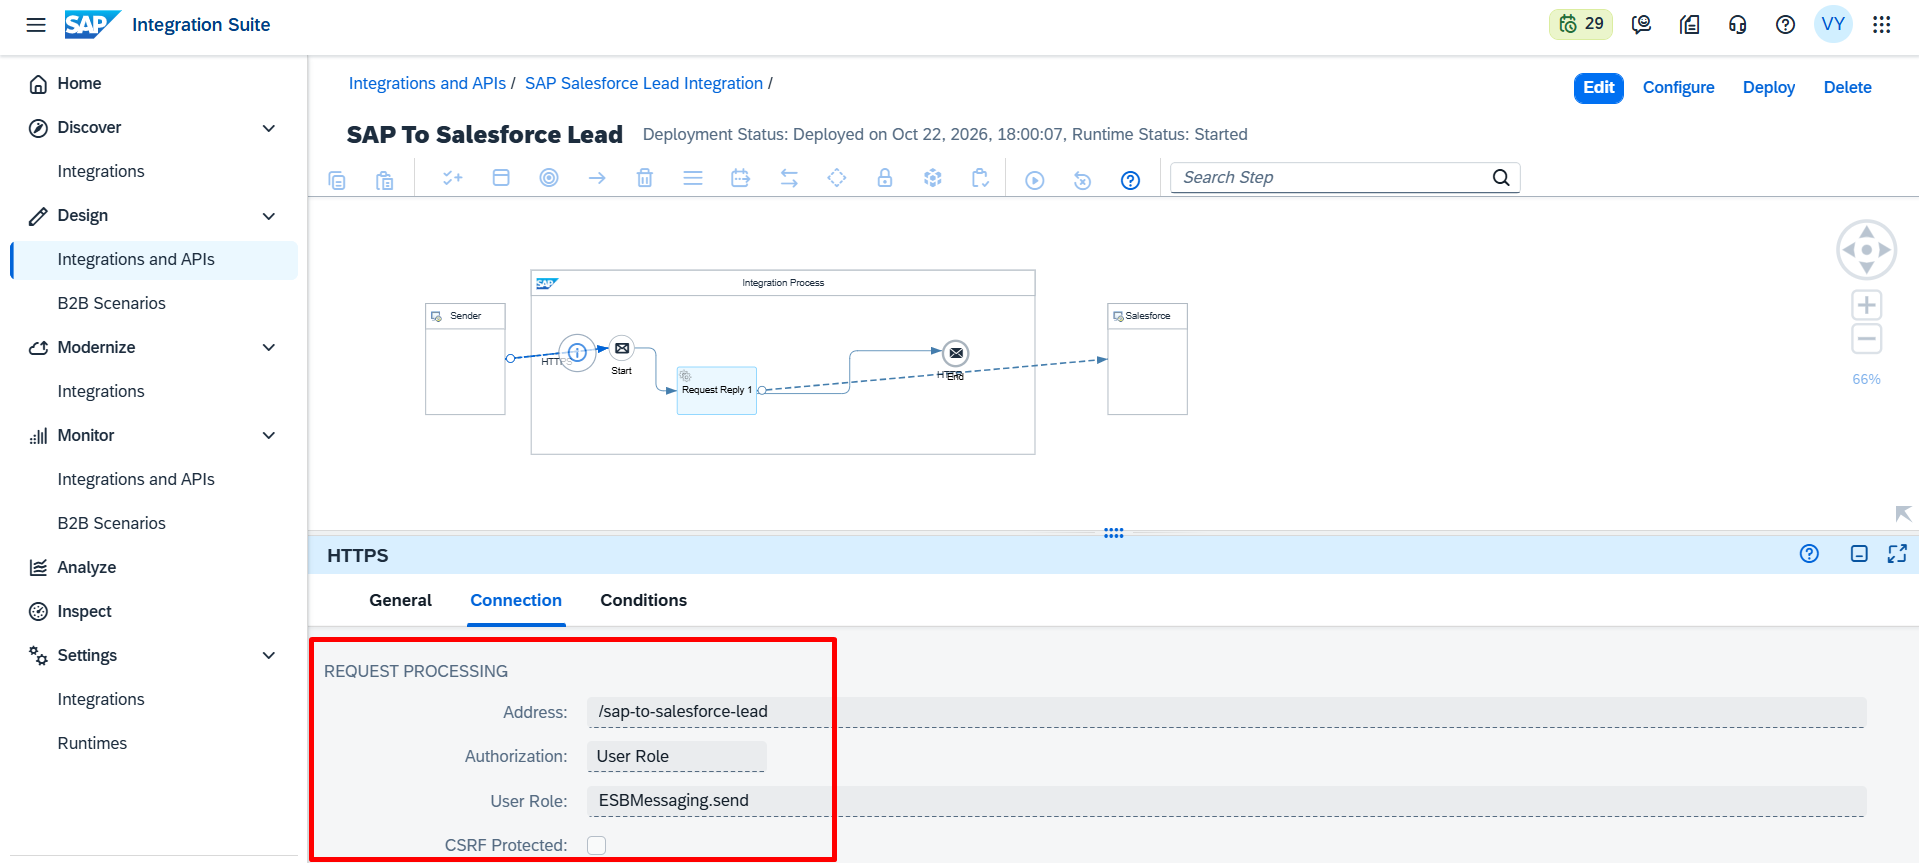
- Select the Sender participant and configure the HTTPS adapter.
- Set the sender address to: /sap-to-salesforce-lead
- Configure the required authentication method and sender authorization role, such as ESBMessaging.send, if applicable.
- Click Save.
Step 2: Add and Configure the Request Reply Step
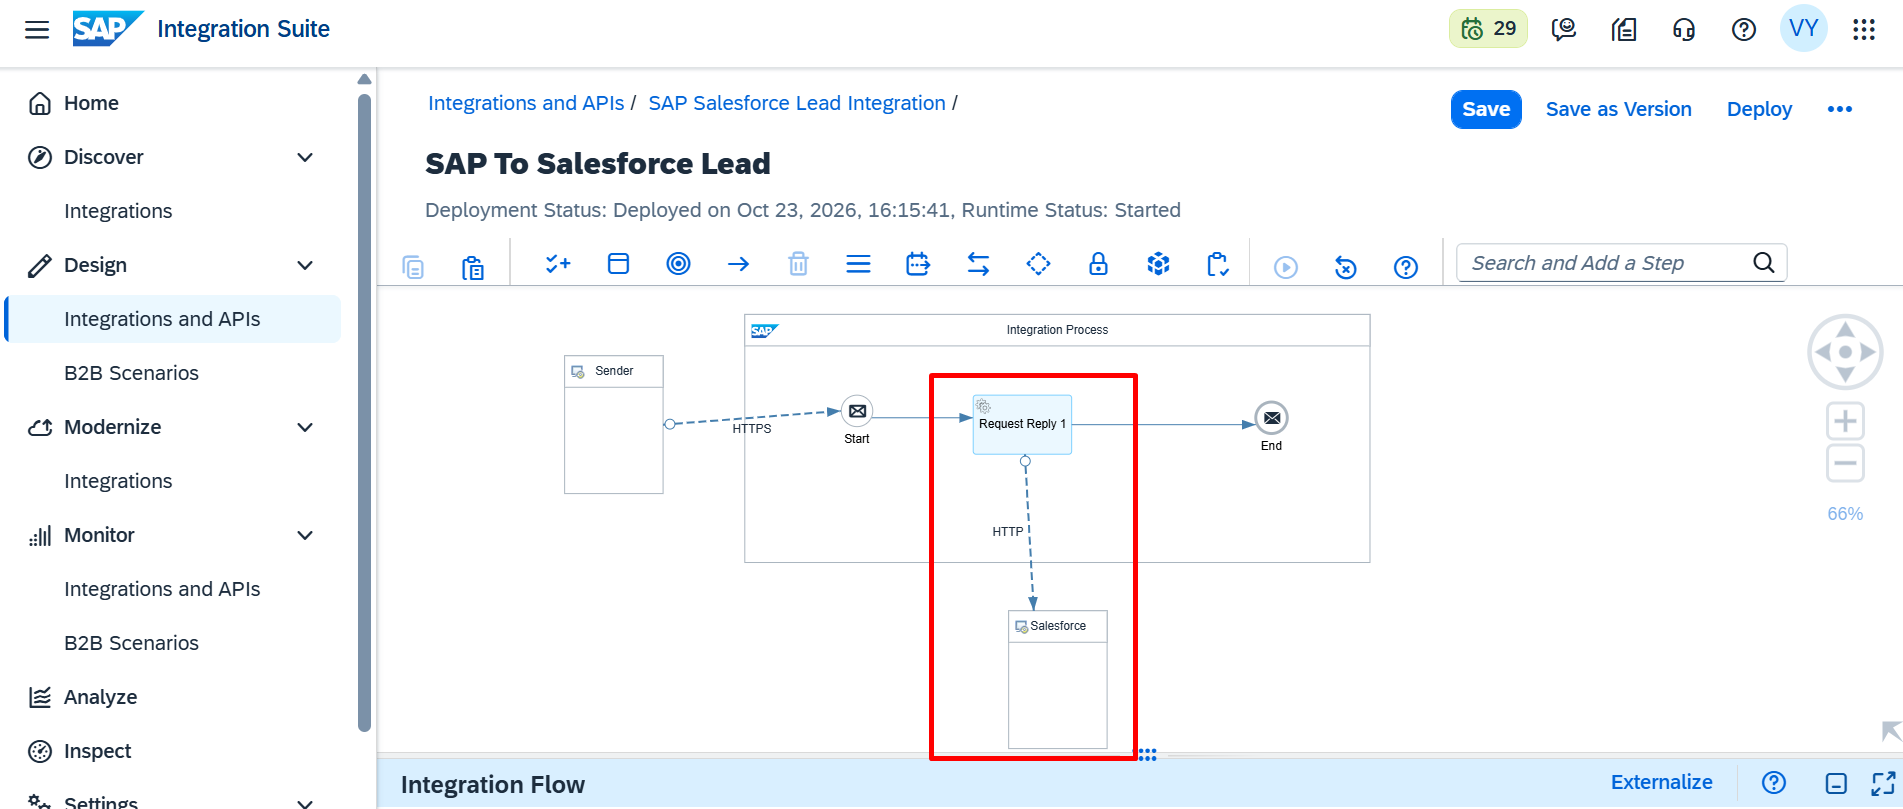
- In the iFlow editor, open the Search panel.
- Search for Request Reply.
- Drag the Request Reply step onto the integration process canvas.
- Connect the Start Message event to the Request Reply step.
- Connect the Request Reply step to the End Message event.
- Add an HTTP Receiver participant to the canvas, if it is not already available.
- Connect the Request Reply step to the HTTP Receiver using the appropriate receiver connection.
- Select the Request Reply step and verify its configuration.
Step 3: Configure the HTTP Receiver Adapter
Select the HTTP Receiver participant and configure the following details:
| Field | Value |
|---|---|
| Address | https://<your-salesforce-domain>/services/apexrest/SAPLeadAPI/ |
| Proxy Type | Internet |
| Method | POST |
| Authentication | OAuth2 Client Credentials |
| Credential Name | Salesforce_OAuth_Cred (this name is Security Material) |
Save the configuration. Ensure the endpoint matches your Salesforce Apex REST URL mapping.
Step 4: Save, Deploy, and Copy the Endpoint
- Click Save to save the integration flow.
- Click Deploy.
- Check the Deployment Status on the iFlow canvas.
- Wait until the status shows Deployed.
- Click Navigate to open the endpoint details.
- Copy the HTTPS endpoint URL and keep it for testing.
This is the SAP BTP sender endpoint that Postman will call. It is different from the Salesforce Apex REST endpoint configured in the HTTP Receiver.
Test the Integration Using Postman
After deployment, send a sample JSON request to the SAP BTP endpoint to verify that the complete integration works.
Step 1: Create a Service Key in SAP BTP
You need the SAP BTP service credentials to authenticate the request from Postman.
- Log in to your SAP BTP Cockpit.
- Select your subaccount.
- Open Services → Instances and Subscriptions.
- Under the Instances section, locate your Process Integration Runtime service instance.
- Open the service instance and select Create Service Key.
- Enter a name, such as Postman_Service_Key.
- Click Create.
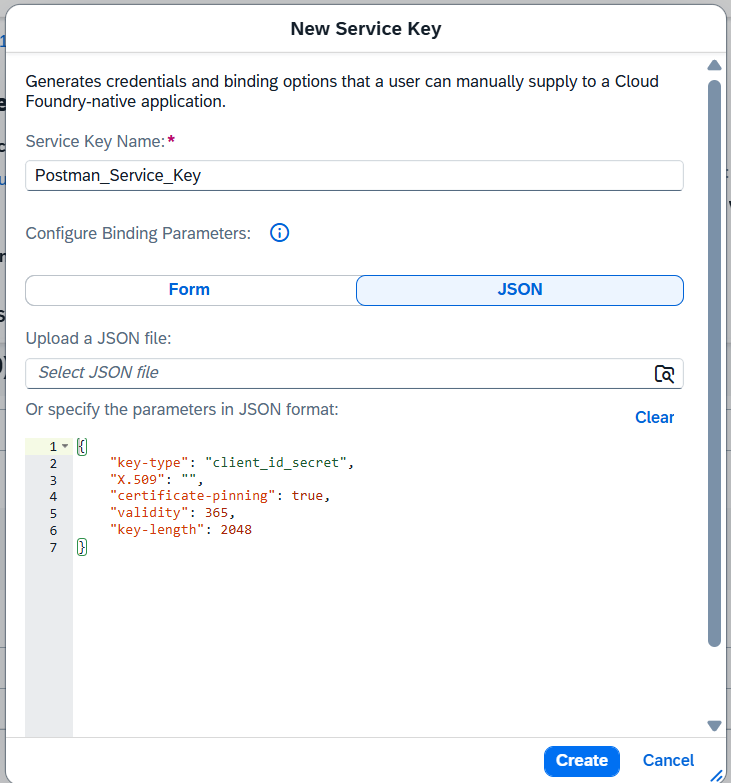
- Open the created service key and copy the following values:
- Client ID
- Client Secret
- Token URL
Step 2: Send a Request From Postman
- Open Postman and create a new HTTP request.
- Select POST.
- Paste the deployed SAP BTP iFlow endpoint URL.
- Open the Authorization tab and select Basic Auth.
- Enter the service key credentials:
- Username: Client ID
- Password: Client Secret
- Open the Headers tab and add:
Content-Type : application/josn
Open the Body tab, select raw, and choose JSON.
7. Enter the following sample payload:
8. Click Send to submit the request.
Expected Response
Status Code: 201 Created
The 201 Created status confirms that the request successfully created a Lead, provided the response is returned by your configured Apex REST API.
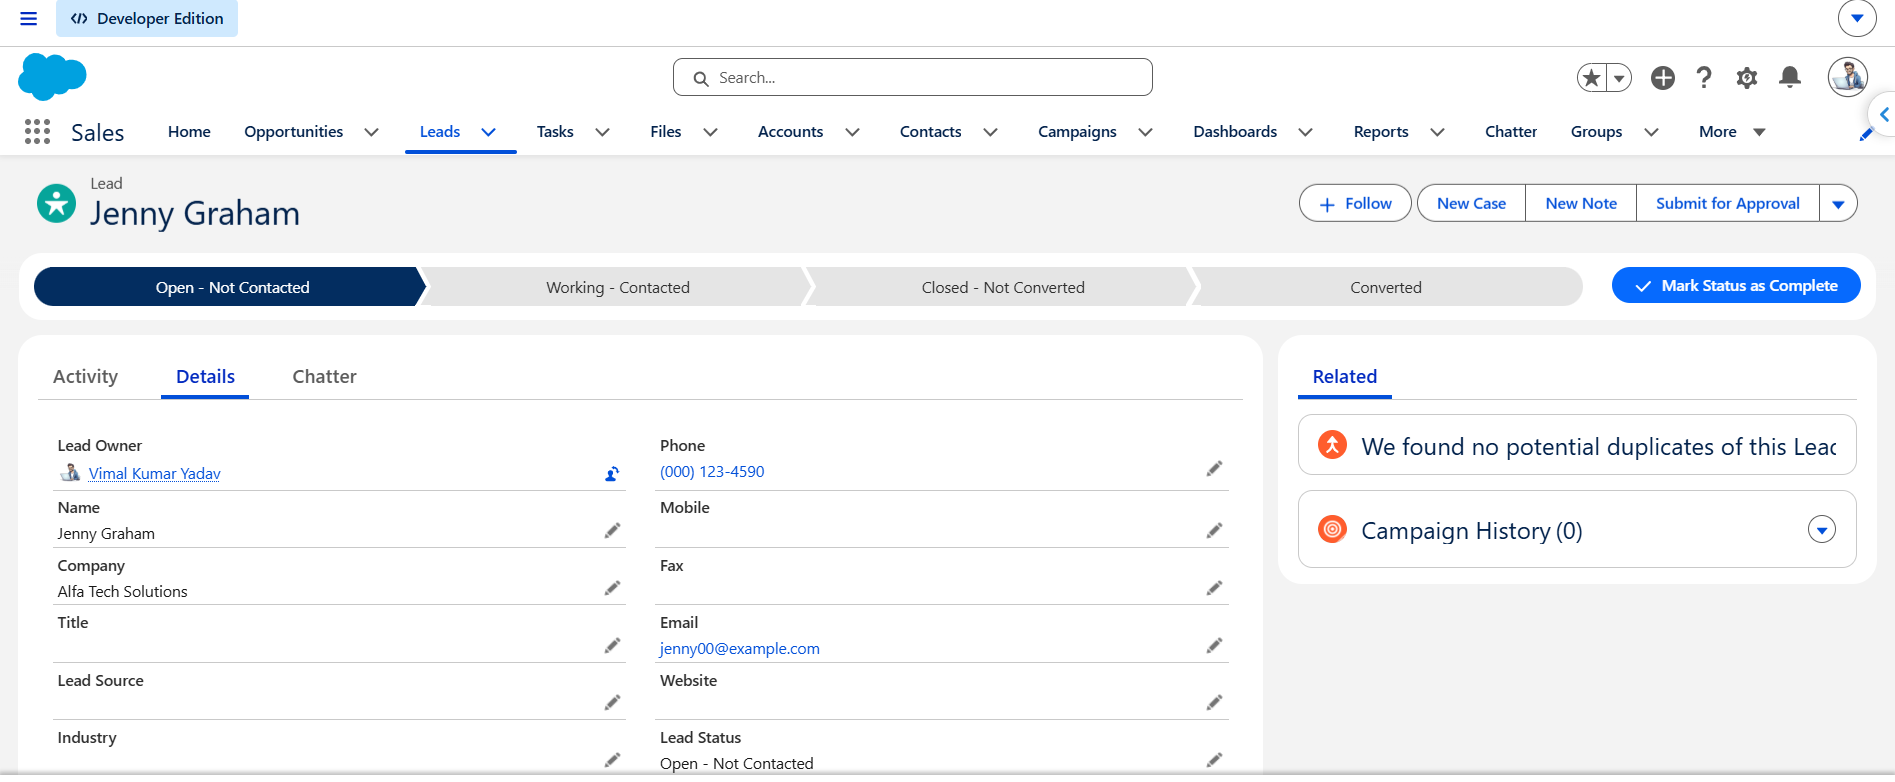
Common Errors and Troubleshooting
During a Salesforce API integration, authentication, endpoint, and payload issues can prevent the request from completing. Check the following details when troubleshooting:
| Error | What to check |
|---|---|
| 401 / invalid token at SAP endpoint | Check the SAP token URL, service-key client ID/secret, token expiry, and that the Bearer token is sent to the runtime endpoint. |
| 403 at SAP Sender | Check the sender authentication mode, assigned role (for example ESBMessaging.send), endpoint path, and any CSRF requirements. |
| unsupported_grant_type from Salesforce | Check the OAuth token request, configured grant type, and whether the Salesforce app supports the selected flow. |
| Invalid_client from Salesforce | Verify the Salesforce Consumer Key/Secret and Salesforce OAuth app configuration. Do not use SAP service-key credentials here. |
| 404 from Salesforce | Check the Salesforce domain, deployed Apex class, and /services/apexrest/SAPLeadAPI/ path. |
| 400 from Apex REST | Inspect the JSON payload, required Lead fields, validation rules, duplicate rules, and the error returned by Apex. |
Conclusion
This guide covered how to connect SAP BTP Integration Suite with Salesforce using a custom Apex REST endpoint. From creating the External Client App to configuring OAuth credentials, building the iFlow, and testing the deployed endpoint, each stage contributes to a working integration.
A well-configured Salesforce REST connection gives businesses a way to exchange data between SAP and Salesforce through controlled API requests. The same foundation can support additional objects and business processes as integration requirements grow.
For organisations planning more complex Salesforce API integration projects, working with an experienced Salesforce partner like HIC Global Solutions can help with authentication design, API security, data mapping, and integration maintenance. You can also extend this example to support other Salesforce records by adapting the Apex class and request payload to your business requirements.
Watch Demo Video
Frequently Asked Questions
The integration requires an SAP BTP account, Integration Suite, a Salesforce Developer Account, an External Client App, OAuth credentials, and a custom Apex REST API.
OAuth 2.0 Client Credentials allows SAP BTP to authenticate API requests using a Consumer Key and Consumer Secret, with Salesforce assigning a configured integration user to execute requests.
SAP Integration Suite acts as middleware, connecting SAP applications with Salesforce through integration flows (iFlows) that manage HTTP requests, authentication, and data exchange.
A 201 Created response indicates that the Apex REST endpoint successfully processed the request and created the Lead records in Salesforce.
Businesses can improve integration reliability through secure OAuth configuration, dedicated integration users, appropriate permissions, accurate data mapping, and ongoing monitoring with support from an experienced Salesforce partner like HIC Global Solutions.

 India
 USA
 UK
 Canada