
Sales representatives often work with Salesforce records that contain a lot of information, including emails, tasks, events, and Chatter activity. Going through all this information manually can make it easy to miss important details.
With Salesforce LWC and Models API, you can build an AI-powered record assistant that brings this information together, summarizes important details, and provides useful suggestions directly inside Salesforce.
In this guide, we’ll build a record assistant that retrieves Salesforce record data, processes it through the Models API, and displays the generated response in a side-panel interface.
Prerequisites
Before getting started, you should have a basic understanding of:
- Salesforce metadata and Custom Metadata Types
- Lightning Web Components (LWC)
- Apex
- Salesforce authentication and integration concepts
How the Salesforce Record Assistant Works
The solution follows a simple flow where Salesforce record information is collected, securely passed through the API layer, and then displayed as an AI-generated response inside the LWC.
Salesforce Record → Apex Controller → Metadata-driven API Layer → Named Credential → Models API → AI-generated Summary → LWC Side Panel UI
Why this architecture?
- Metadata-driven configuration: API endpoints, headers, and settings can be managed through metadata instead of being hardcoded into Apex.
- USER_MODE: Salesforce applies CRUD and field-level security while querying records, helping keep the implementation aligned with platform security.
- Named Credentials: Authentication, endpoints, and secrets are managed centrally instead of being hardcoded in Apex.
- Dynamic prompts: The assistant can use the current record, related activities, and user messages to generate more relevant responses.
- Contextual routing: The component can identify the current Salesforce page or record and adjust its response based on that context.
Step-by-Step Guide
Follow the steps below to create the metadata, authentication setup, Apex controller, LWC, and finally add the assistant to your Salesforce application.
Step 1: Create the Custom Metadata Type
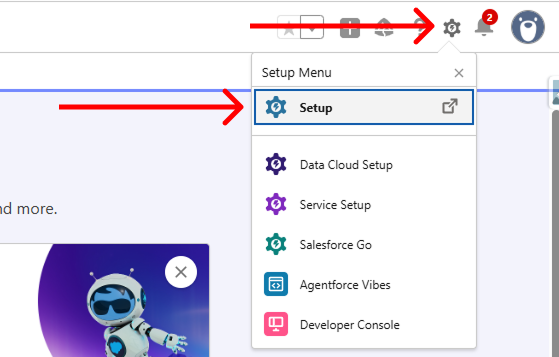
- Go to Setup.
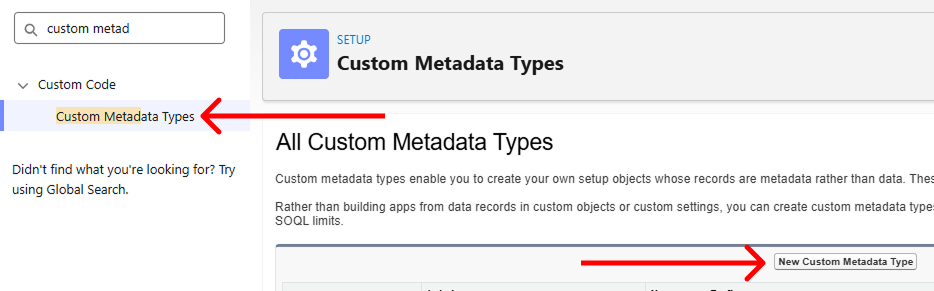
- Search for Custom Metadata Types in Quick Find.
- Click New Custom Metadata Type.
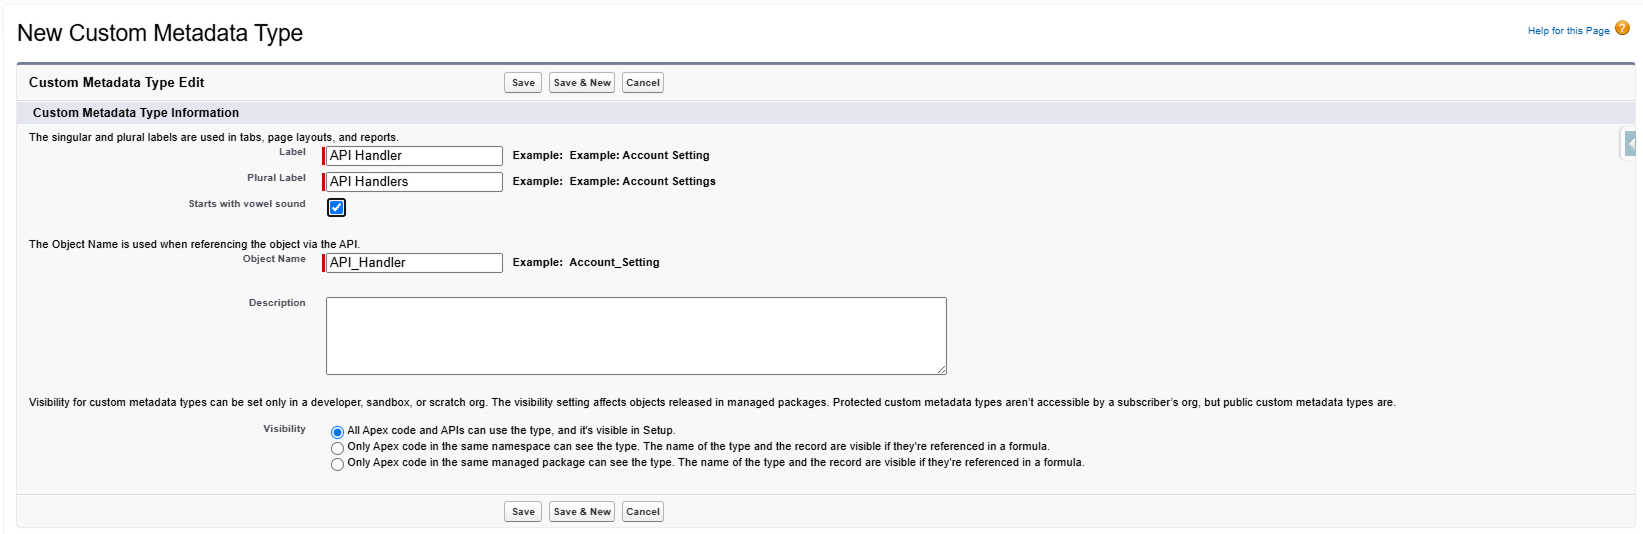
- For this example, enter API Handler as the Label.
- Click Save.
Step 2: Create the Metadata Fields
- Open the API Handler Custom Metadata Type.
- Create the required fields based on your implementation.
These fields will store the API configuration details that are later used by the Apex controller.,

Step 3: Create the Models API Metadata Record
- Click Manage API Handlers.
- Click New.
- Configure the metadata record with the following values:
- Click Save

| Property | Value |
|---|---|
| Label | ModelsAPI |
| Batch Delay | 12,000 |
| Named Credential Name | Salesforce_ModelsAPI_Named_Credential |
| Is Active | Checked |
| Endpoint | /einstein/platform/v1/models/{modelName}/chat-generations |
| Header Parameter | { “x-sfdc-app-context”: “EinsteinGPT”, “x-client-feature-id”: “ai-platform-models-connected-app”, “Content-Type”: “application/json;charset=utf-8” } |
| Method | POST |
| Retry Delay | 12,000 |
| Max Retry Limit | 3 |
| Timeout | 120,000 |
This metadata record keeps the API configuration separate from the Apex code, making it easier to maintain.

Step 4: Create an External Client App
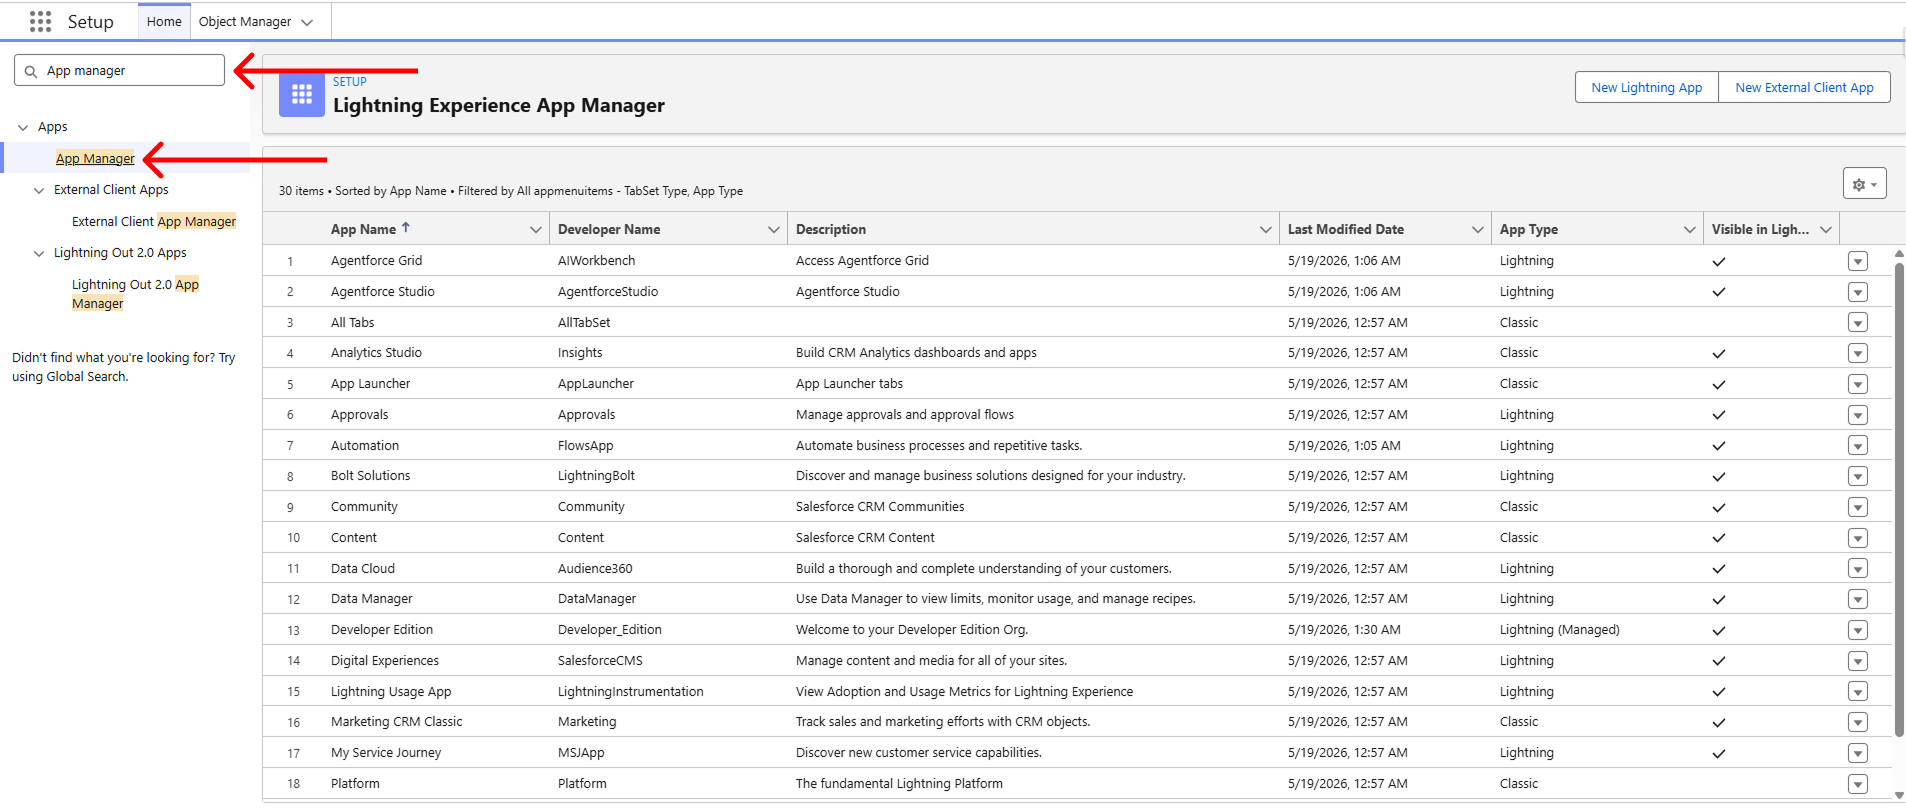
- Go to Setup → App Manager.
- Click New External Client App.

- Enter the required application details
| Setting | Value |
|---|---|
| External Client App Name | ModelsAPI OAuth |
| API Name | ModelsAPI_OAuth |
| Contact Email | yourEmail |
| Distribution State | Local |
| Enable OAuth | Checked |
| Callback URL | https://login.salesforce.com |
| OAuth Scopes | Manage user data via APIs (api) Perform requests at any time (refresh_token, offline_access) Access chatbot services (chatbot_api) Access the Salesforce API Platform (sfap_api) |
| Enable Client Credentials Flow | Checked |
| Require secret for Web Server Flow | Checked |
| Require Proof Key for Code Exchange (PKCE) extension for Supported Authorization Flows | Unchecked |
| Require secret for Refresh Token Flow | Checked |
| Issue JSON Web Token (JWT)-based access tokens for named users | Checked |
- Click Save
Step 5: Configure OAuth Settings
- Open Policies → Edit.
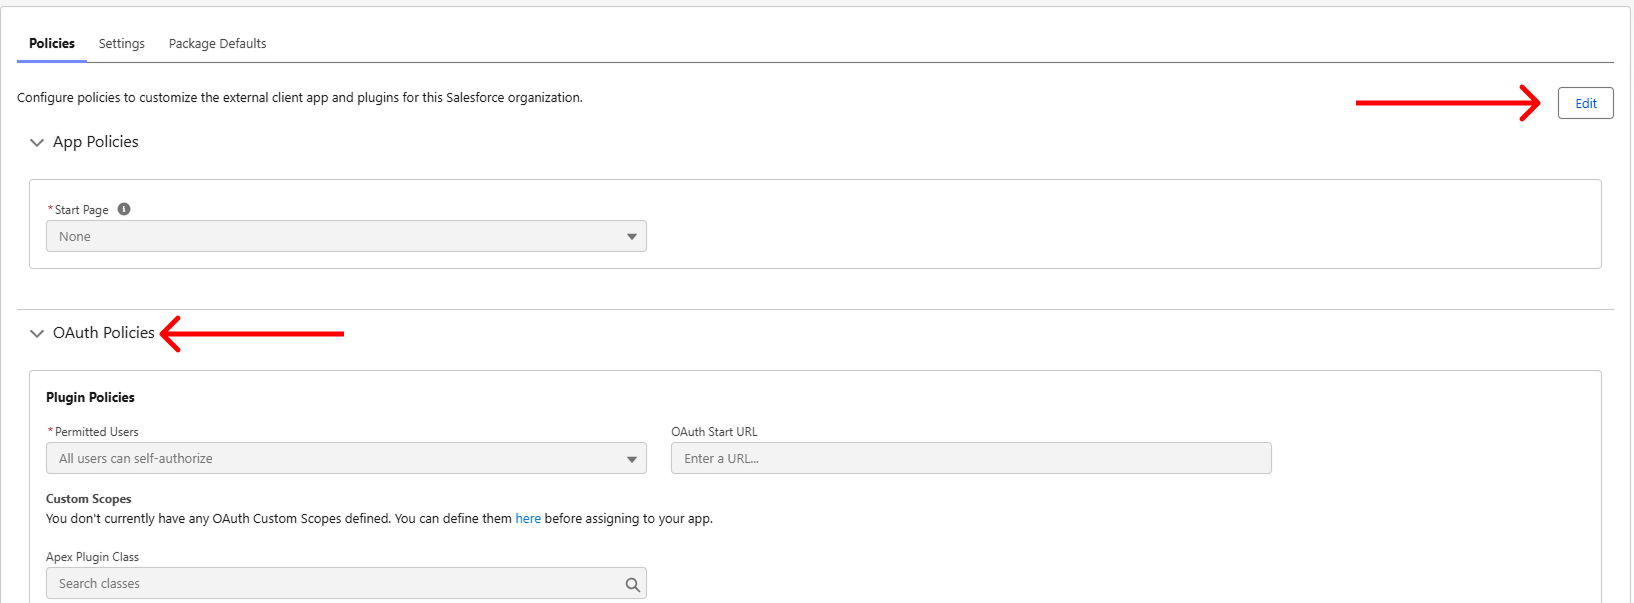
- Enable Client Credentials Flow and Run As (Username)
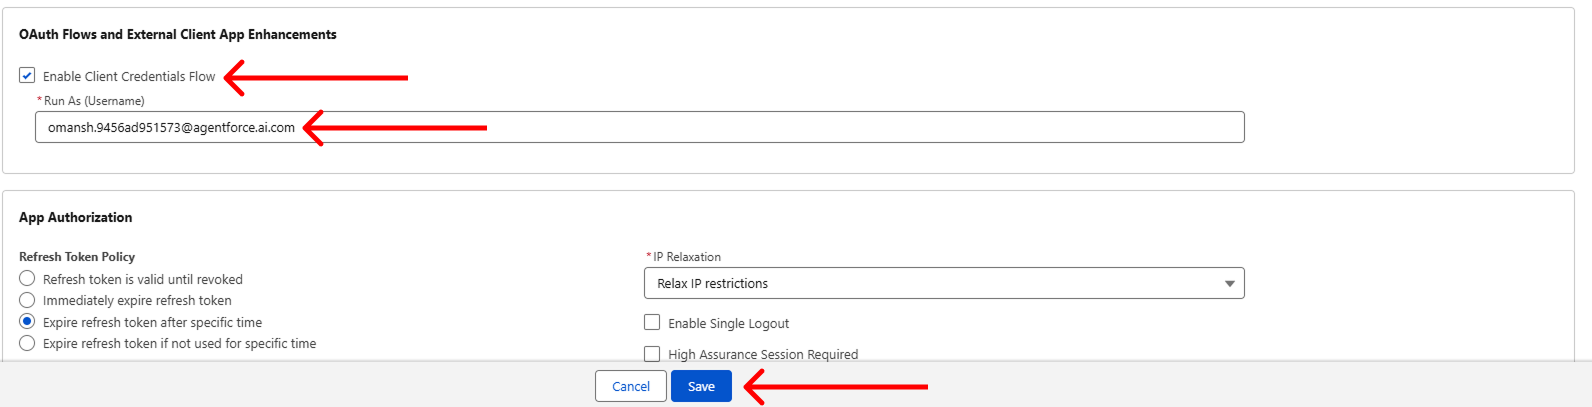
- Click Save
Step 6: Retrieve the Consumer Key and Secret
- Open the Settings tab of the External Client App.
- Click Consumer Key and Secret.

- Enter the code you will receive in the email.
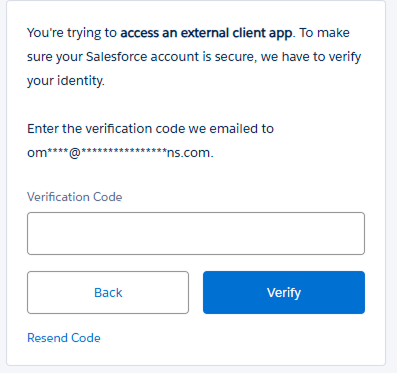
- Copy the Consumer Key and Consumer Secret.
Step 7: Create the External Credential
- Go to Setup → Named Credentials.
- Open External Credentials.
- Click New.

- Enter the required details for the external credential.
- Click Save.
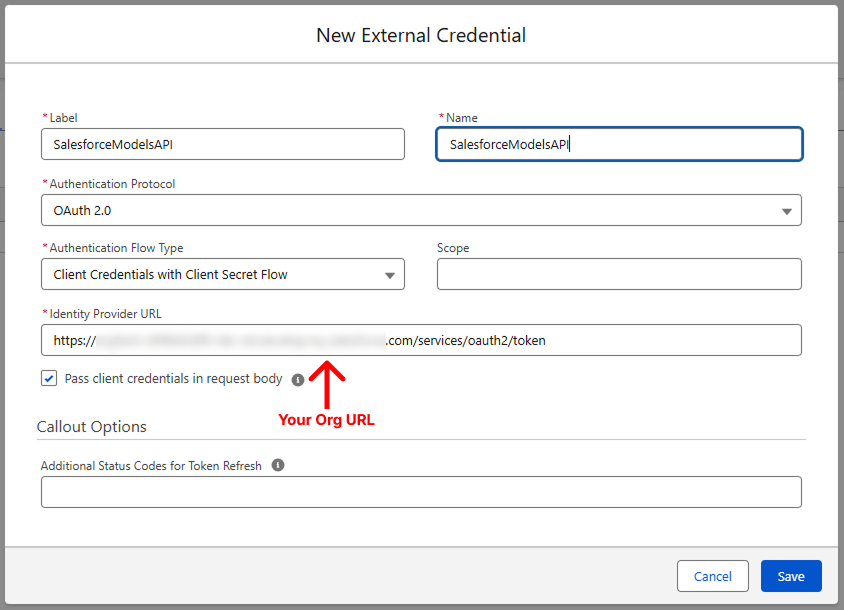
The External Credential stores the authentication information needed to securely connect with the Models API.
Step 8: Configure the External Credential Principal
- Open the External Credential you created.
- Go to Principals.
- Click New.

- Configure the principal using the required authentication details.
- Click Save.
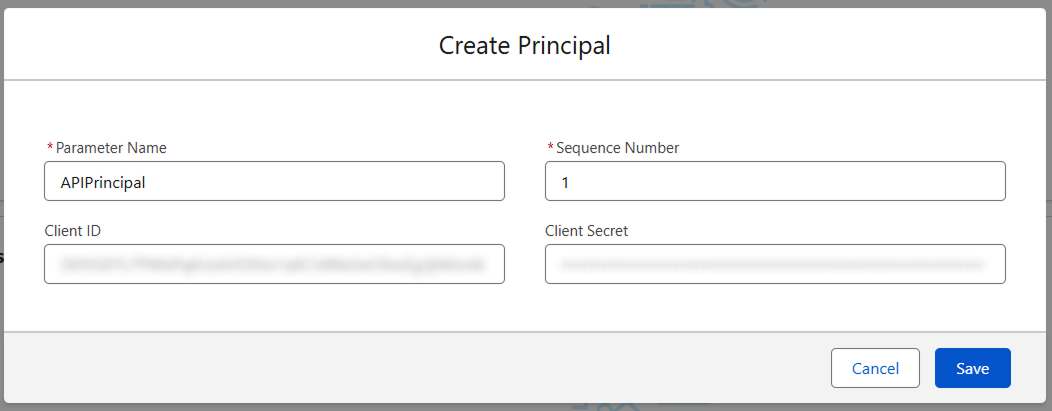
This principal connects the external credential with the authentication setup used for the API connection.
Step 9: Create the Named Credential
- Go to Named Credentials.
- Click New.

- Enter the required details for the Models API connection.
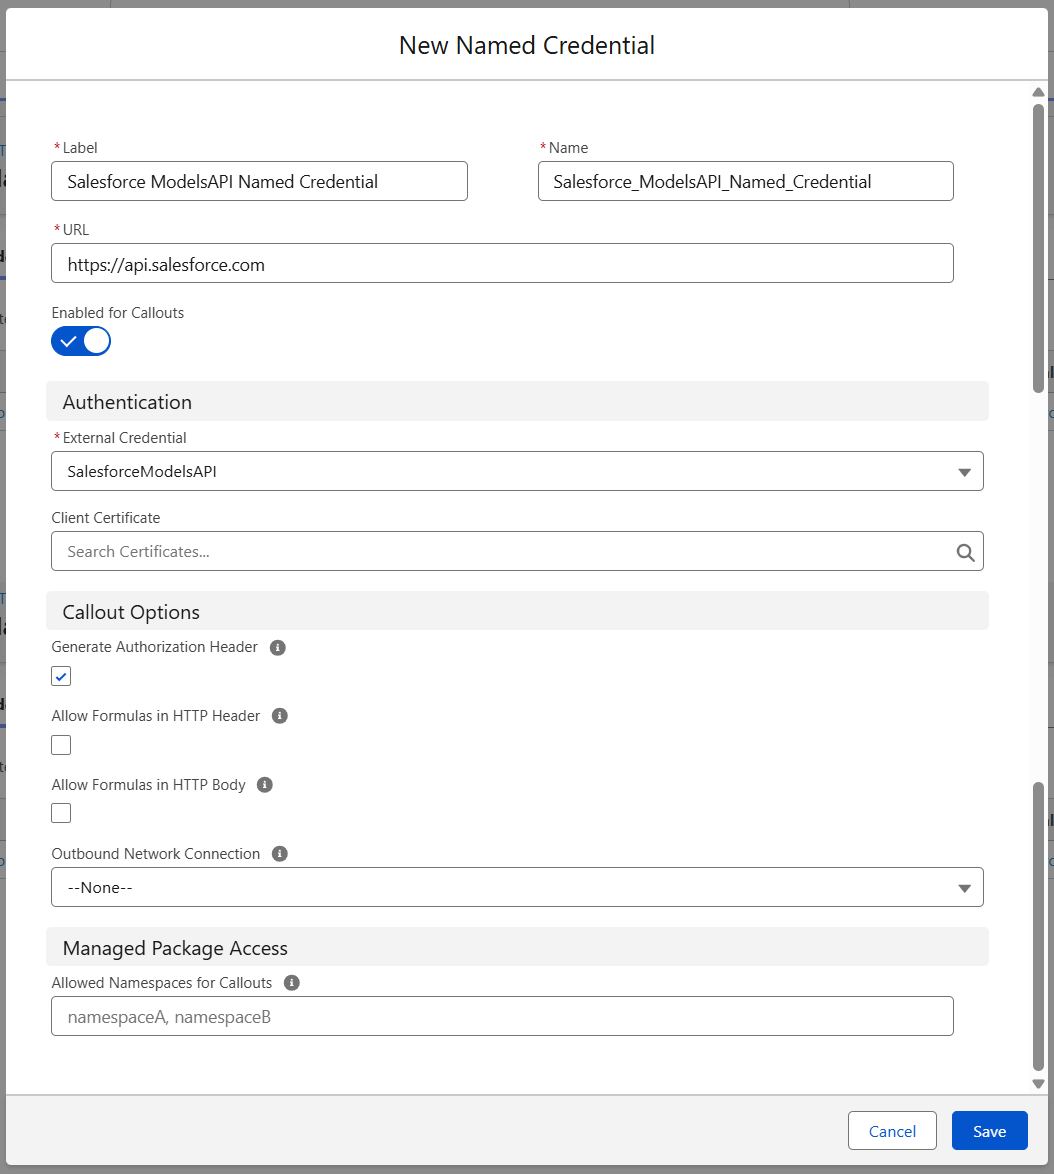
- Select the external credential configured in the previous steps.
- Click Save.
The Named Credential keeps the endpoint and authentication details in one place, so they do not need to be hardcoded in Apex.
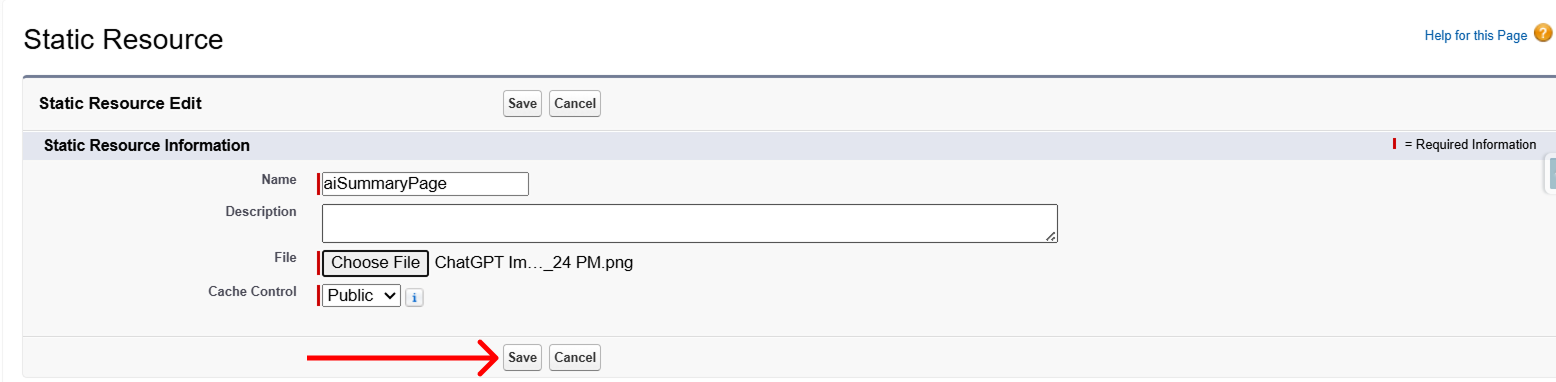
Step 10: Add the AI Assistant Static Resource
- Go to Setup → Static Resources.
- Click New.
- Enter a suitable name for the static resource.
- Upload the background image you want to use for the assistant.

- Click Save.
Step 11: Create the Apex Controller
The Apex controller retrieves the Salesforce record and its related activities, prepares the information, and sends it to the Models API.
- Open your Salesforce DX project.
- Run the Apex class creation command.
sfdx force:apex:class:create -n sidePanelAIAssistantHandler
- Add the following Apex code.
Step 12: Create the Lightning Web Component
- Run the LWC creation command.
sfdx force:lightning:component:create –type lwc -n SidePanelAIAssistant -d force-app/main/default/lwc - Add the component files.
SidePanelAIAssistant
HTML
JS
CSS
XML
Step 13: Deploy the AI Assistant Components
- Right-click on the Apex file → SFDX: Deploy This Source to Org
- Right-click on the XML file → SFDX: Deploy This Source to Org
Step 14: Add the AI Assistant to the Utility Bar
- Go to Setup → App Manager.
- Find the Salesforce app where you want to add the assistant.
- Click Edit.
- Open Utility Items (Desktop Only).

- Open Utility Items (Desktop Only).
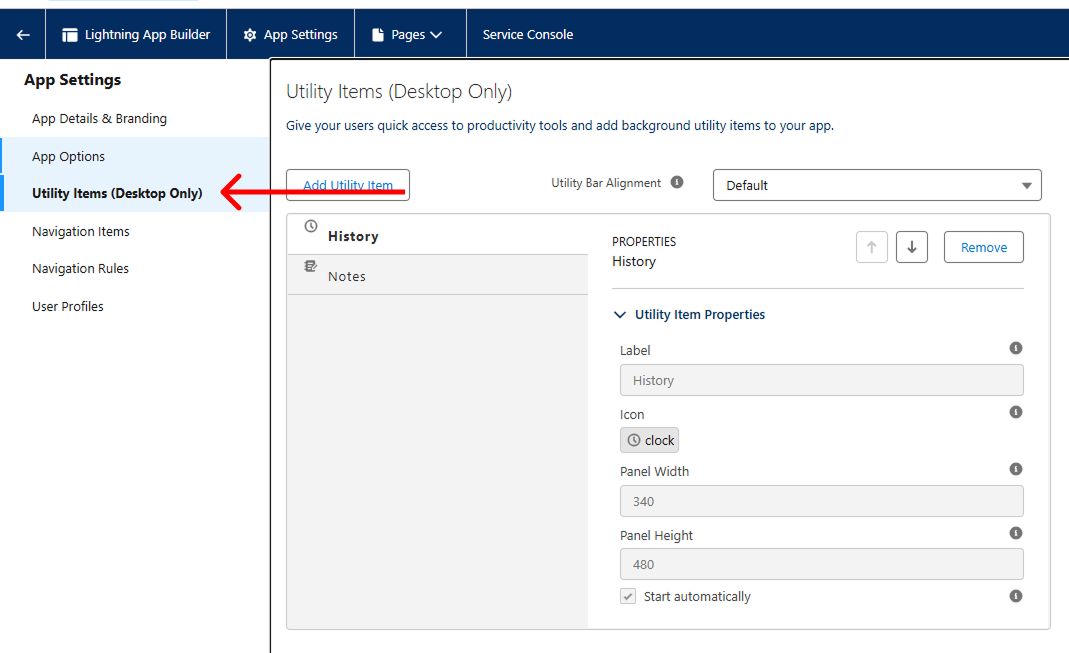
- Click Add Utility Item.
- Select the AI Assistant component.
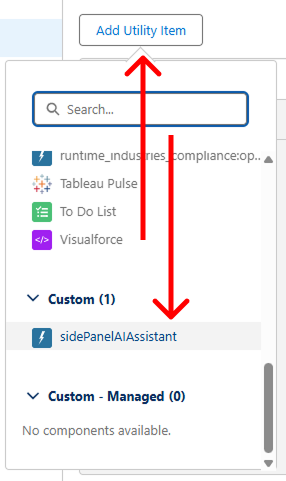
- Configure its label, icon, width, height, and startup behavior.
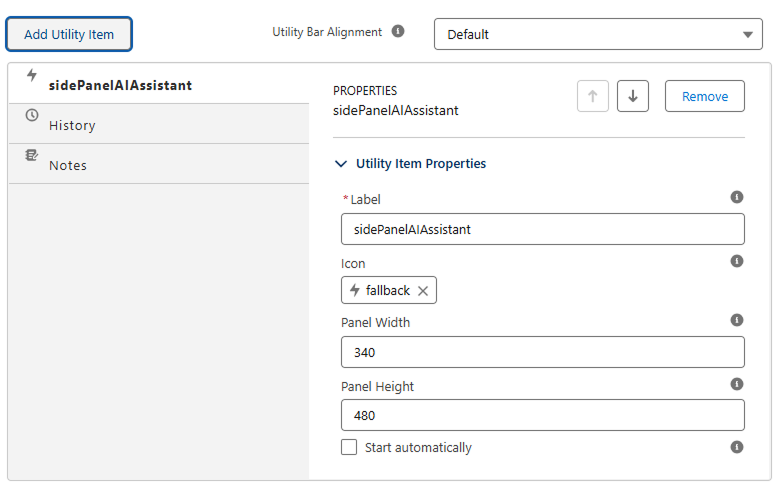
- Save the app.
Current Structure Limitations
Before using this approach in production, there are a few limitations worth considering.
Large Payload Handling
The solution retrieves the main record, Tasks, Events, and Chatter activity together. Records with a large amount of activity can therefore create a large payload.
Prompt Injection Concerns
User-generated content from Chatter posts, comments, or other sources may contain misleading instructions. Additional validation and filtering may be needed before sending this information to the model.
Token Optimization
Sending unnecessary information to the model can increase token usage and processing time. Filtering the most relevant data can help keep prompts smaller and more efficient.
Long Chatter Feed Summarization
Records with extensive Chatter history can create large contextual inputs. Filtering or prioritising recent activity can help improve response time.
API Consumption
Frequent model requests can increase API usage and related costs. Caching, throttling, and request optimization should be considered as the solution grows.
Conclusion
Building a record assistant with Salesforce LWC and Models API brings AI capabilities directly into Salesforce, helping sales representatives understand record information without manually checking every activity and related detail.
By combining Apex, metadata, Named Credentials, and LWC, teams can create a Salesforce AI assistant that works with records, Tasks, Events, and Chatter while keeping the experience inside Salesforce.
For developers exploring Models API Salesforce implementations, this approach offers a practical foundation. Before production, optimize payloads, protect prompts, manage API usage, and carefully handle sensitive information.
Watch Demo Video
No Data Found.

 India
India  USA
USA UK
UK Canada