Salesforce Omni-Channel is a feature available across different Salesforce Clouds, including Sales Cloud, Service Cloud, and others. While it is commonly associated with customer service and support, Omni-Channel can also be utilized in the context of sales to enhance the overall sales process and customer engagement.

Salesforce’s Omni-Channel feature allows organizations to manage and route customer interactions across various channels such as phone calls, emails, web chats, social media, and more. It ensures that customer inquiries are efficiently handled by the most appropriate available agent, regardless of the channel through which the customer reaches out.

In this article, we will focus on the step-by-step process of configuring and implementing Omni-Channel in a Salesforce organization. Let’s begin!

Steps to Set up the Salesforce Omni-Channel in your org


Step 1: At first User has to enable the Omni-Channel features by following:

Quick find box → Omni-Channel Settings → Enable Omni-Channel(Checkbox)

Screenshot 1

Step 2: Create Service Channel

Quick find box → Service Channels → New

2 61158b17d3
3 611592c259


Step 3:
Create Routing Configuration

Quick find box → Routing Configurations → New

4 6116045b34


Step 4:
Enter the Routing Name, Routing Priority, Routing Model, and Units of Capacity then click on the save button

5 61161810e7


Step 5:
We have to create a Queue to attach the Routing Configuration with Queue

6 6116220c01

7 6116334ddb


Step 6: Create Presence Configurations

Quick find box → Presence Configurations → New

8 61164ebf9e9 6116594159


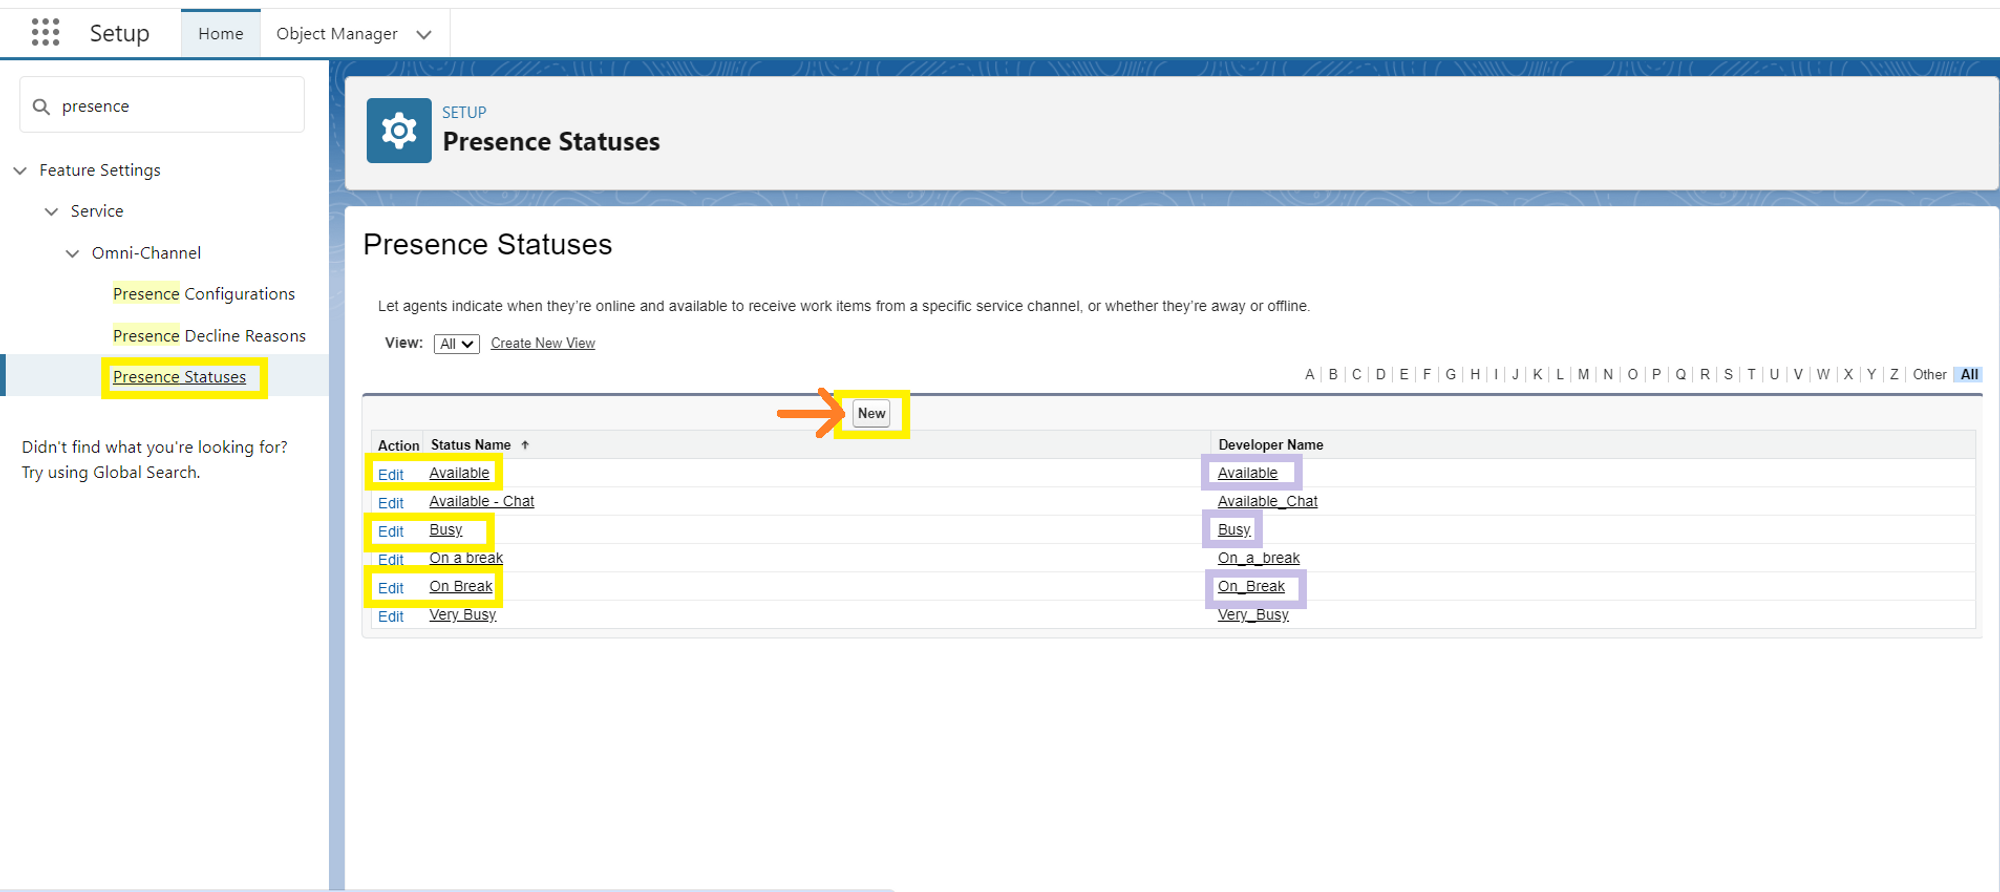
Step 7: Create Presence Statuses

Quick find box → Presence Statuses → New.

10 61166c99fa


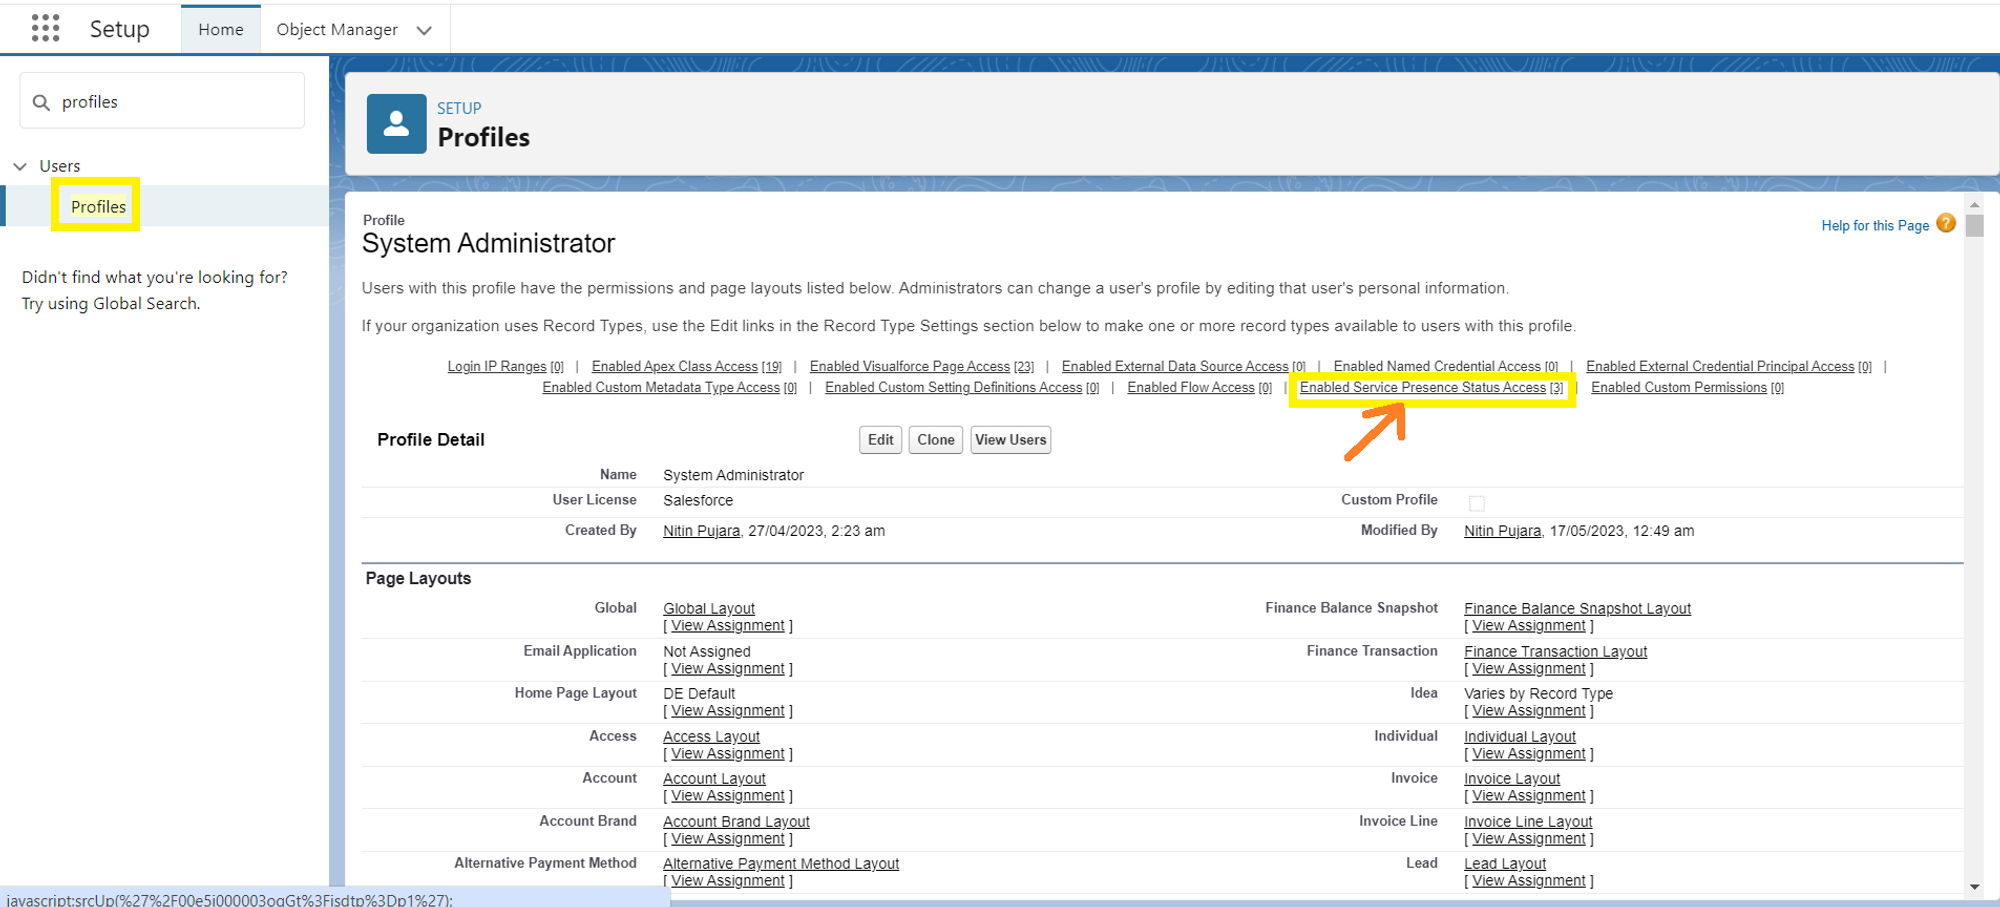
Step 8: In the System Administrator Profile grant user access permission to presence statuses

Quick Find Box → Profiles → System Administrator → Enabled Service Presence Status Access(Edit)

11 611679395d
12 61168fa1d6


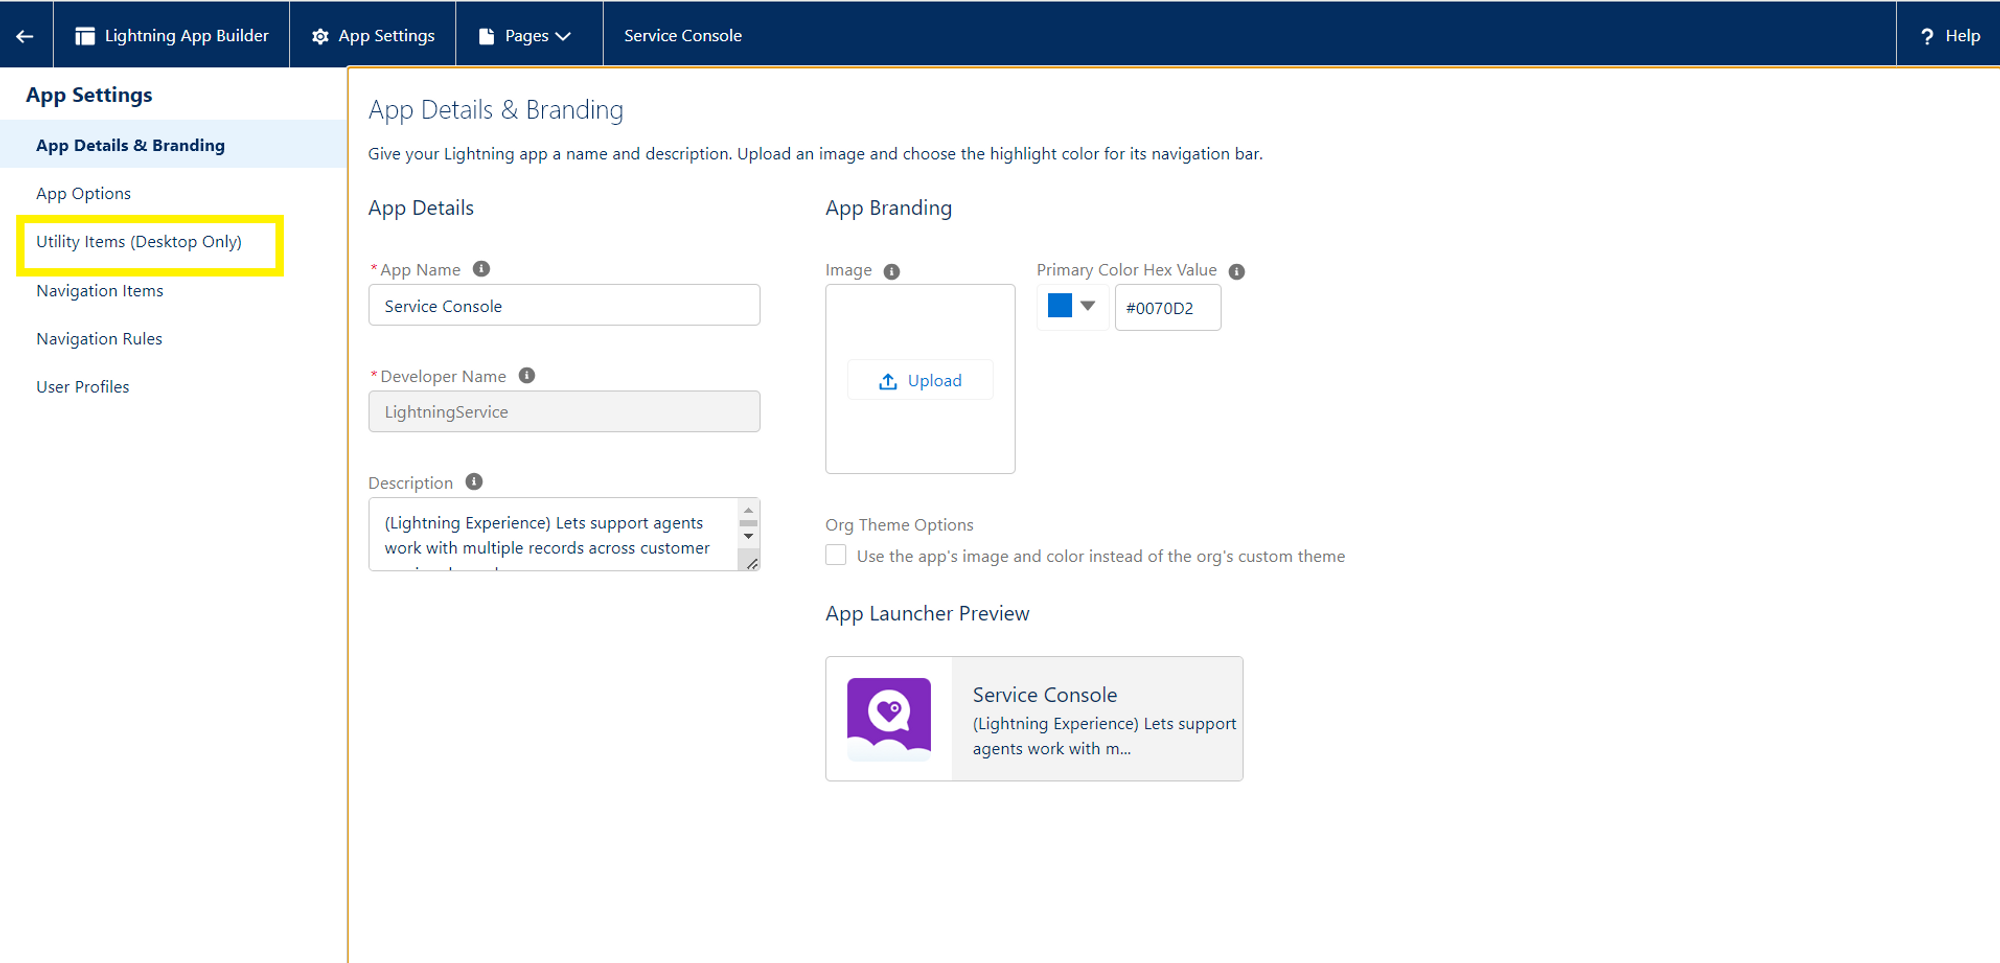
Step 9: Add the Omni-Channel Component to the Console

Quick Find Box → App Manager → App Name(Service Console) → Edit

13 61175437b3

14 611765eec1

15 61177a0c18


Step 10: Navigate to Service Console, on the Console Page you will see the Omni-Channel box in the bottom left corner.

open it & select the status as you want.

16 6117839a34

17 611794a123

When a Case is assigned to the Queue, Omni-Channel automatically routes it to an available agent.

18 61180ec842

19 61181ee072

Conclusion:

 We hope this detailed guide helps you set up and optimize Omni-Channel to streamline your customer service operations effectively. Try out the solutions in your org and feel free to share your suggestions with us. Contact us! 

Also, for more blogs on Salesforce Development solutions, stay tuned!

Related Articles
Expert Guide On Nominal XIRR Calculation Using LWC in Salesforce

When building financial tools within Salesforce, handling irregular cash flows with precision is a must. Whether you’re developing investment trackers, portfolio performance dashboards, or funding monitors, calculating Nominal XIRR (Extended Internal Rate of Return) becomes essential. In this blog, you’ll learn how to build a Lightning Web Component (LWC) in Salesforce that calculates Nominal XIRR […]

Read More
Beginners Guide to Making Your LWC Component Multilingual

If you’re wondering how to make your LWC component multilingual, you’re already ahead of the curve. Global users expect content in their native language, and Salesforce gives you the tools to deliver exactly that. With Custom Labels and the Translation Workbench, you can easily localize your Lightning Web Components without touching a single line of […]

Read More
Hands-On Guide Building a Drag-and-Drop Form Builder Using Lightning Web Components

Drag-and-drop interfaces are a user experience staple, and when paired with the power of Lightning Web Components (LWC), they unlock dynamic, highly interactive Salesforce components. In this blog post, we’ll walk you through how to build a custom drag-and-drop form builder in LWC. Users can drag form fields like text inputs and dropdowns into a […]

Read More
Please Make Blog Banner How to Create an Agentforce Enabled Scratch Org in Salesforce 100 1

Setting up an Agentforce-enabled scratch org is the most important step for developers who want to experiment with AI features such as Prompt Builder and Einstein GPT. Whether you’re developing the next generation CRM software or experimenting with how generative AI may improve user experience, a scratch org equipped with Agentforce is your playground. Follow […]

Read More
Step-by-Step Guide to Enhance Your LWC Development Workflow with the Logger API

Are you looking to streamline your LWC development workflow but confused about how to do it? Then you are in the right place. The Salesforce Logger API is a powerful tool that helps you monitor, debug, and improve code quality in real time.  This step-by-step guide walks you through how to set it up and […]

Read More
Enhancing Your Salesforce Experience with a Custom Activity Component

In today’s fast-paced business landscape, productivity hinges on streamlined workflows and intuitive interfaces. While Salesforce offers robust activity tracking capabilities, sometimes the standard components fall short of specific organizational needs.  That’s where a Custom Activity Component comes in—designed to tailor your activity management experience, boost user efficiency, and provide deeper insights into customer interactions. In […]

Read More
Our Location worldwide
Indian Flag India
3rd Floor, A-10, Pegasus Tower, Sector 68, Noida, Uttar Pradesh 201301 +91-1203117884
United States of America Flag USA
333 West Brown Deer Road Unit G – 366 Milwaukee WI, USA 53217 +1(262) 310-7818
United Kingdom Flag UK
7 Bell Yard, London, WC2A 2JR +44 20 3239 9428
Canada Canada
HIC Global Solutions INC
43 Lafferty Lane, Richmond Hill, L4C 3N8, CA +1(262) 310-7818