Einstein is an AI-powered chatbot that leverages natural language processing and machine learning to understand and respond to user queries conversationally. It can handle a wide range of tasks, from answering FAQs to providing personalized recommendations.

Enabling the Einstein chatbot on your website can revolutionize your customer support and engagement strategies by providing a conversational and personalized experience to your users.

Through careful configuration and integration, you can seamlessly incorporate the chatbot onto your website or public site.

Hence, in this blog today, we will walk you through the steps to Enable Einstein Chatbot on Your Website or Public Site. Here we go!

Prerequisites to Deploy Einstein Chatbot

Before deploying an Einstein Chatbot, ensure that the following prerequisites are met:

  1. Chat Setup: Set up the Live Agent and Chat settings in Salesforce to enable chat functionality and routing of chat requests to the Einstein Chatbot.
  2. Language Support: If your chatbot is designed to handle multiple languages, ensure that it is trained with the appropriate language models and supports the necessary languages.

Steps on how to enable chatbot on your website or public site:

Step 1: Create an Experience Cloud Site

In the first step, we will create an Experience Cloud site. In the Salesforce platform, use the Quick Find box and search Digital Experience>All site>Click new.

step 1

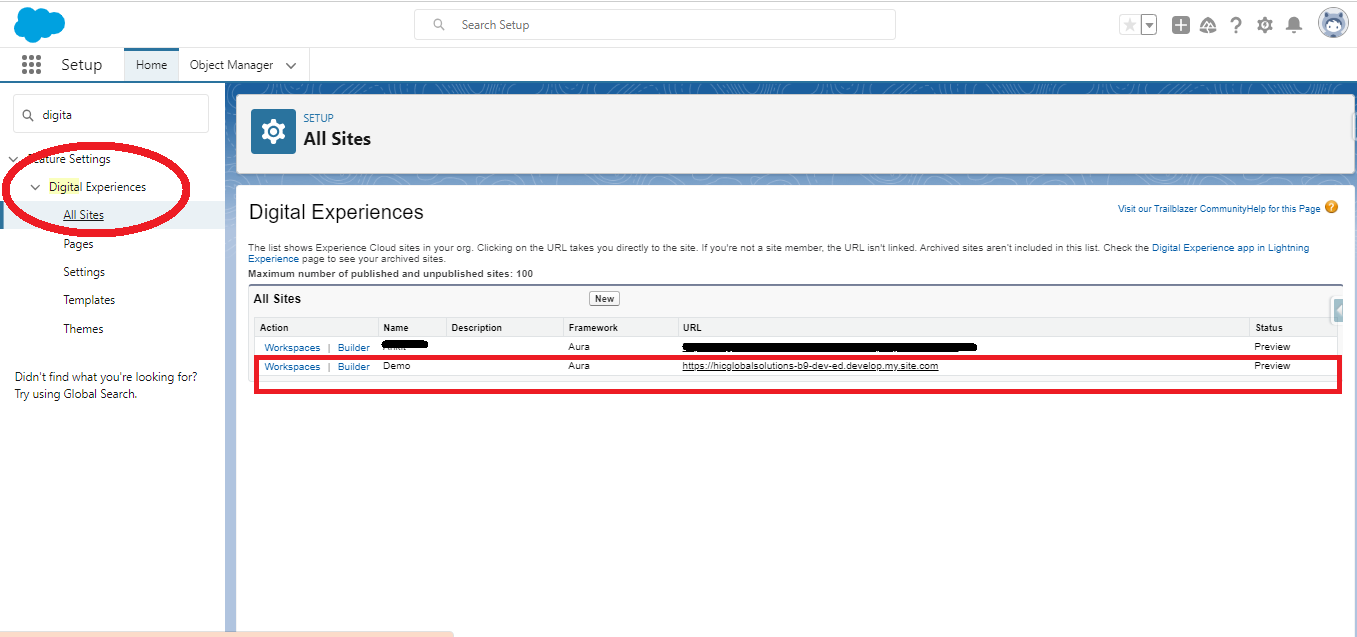
Make sure your framework is Aura.

Step 2:Add Your Website in CORS

In the second step, Search “CORS” in the quick find box in salesforce org. Add your website in CORS to allow your chatbot on your website. And enable “Cross-Origin Resource Sharing (CORS) Policy Settings”.

If you use a website subdomain then add a website subdomain in CORS like this “https://*.example.com” Format. I have added the domain and subdomain in CORS.

Check the Below screenshot.

step 2

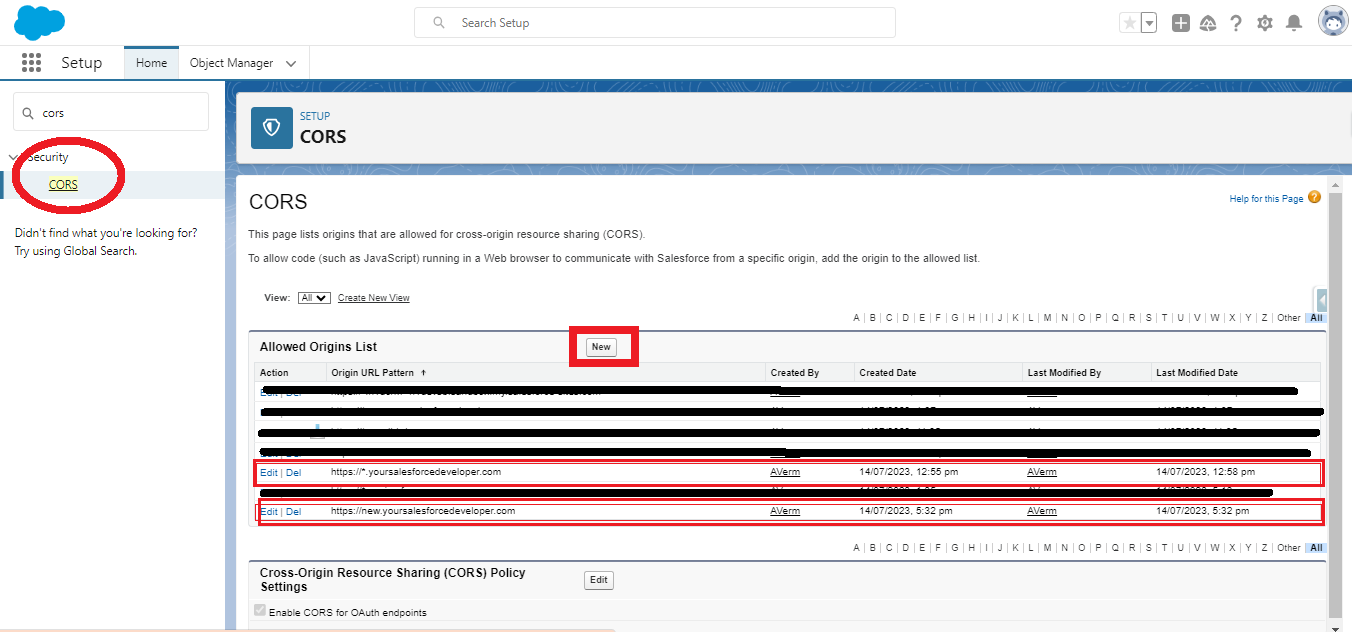
CORS allows your website to deploy a chatbot

Step 3: Embedded Service Deployments

Now search on the quick find box “Embedded Service deployments”. You have already created “Embedded Service deployments” Click on Edit. Ensure that you have correctly specified the Experience Cloud site as the Site Endpoint in the “Embedded Service Deployments”

step 3

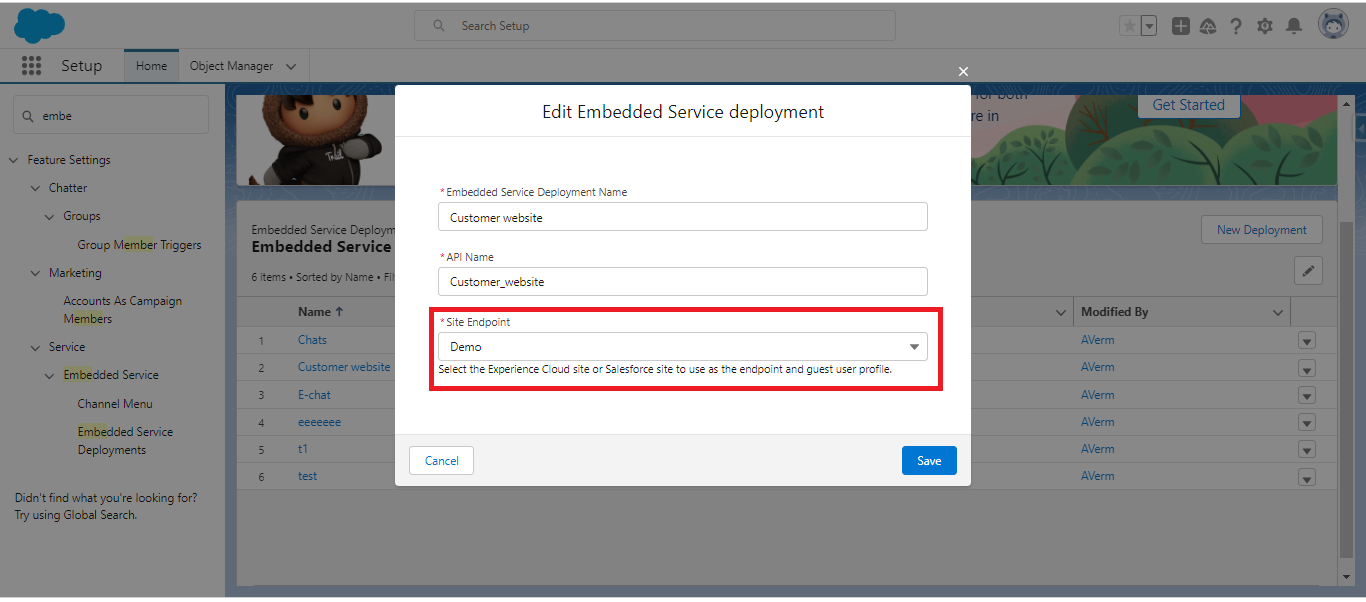
Now, you can deploy Chatbot successfully on your website.

Conclusion

Following these straightforward steps, you can effortlessly integrate Einstein Chatbot into your public website. If you’re further interested in creating chatbot dialogue intents, check out our blog for detailed instructions.

And to keep learning about exciting Salesforce development solutions, stay tuned to our blogs!

Related Articles
Step-by-Step Guide to Integrating Salesforce Doc-Gen with eSigning Tools

In today’s fast-paced digital landscape, streamlining document workflows is no longer a luxury—it’s a necessity.  Integrating a document generation app, like Docs Made Easy, with an eSigning tool, helps businesses automate the entire document lifecycle—from creation to signature—saving time, reducing errors, and boosting productivity. In this guide, we’ll walk you through the key steps, tools, […]

Read More
How to Build a Real Time Chat Application Using LWC and Models API

The Models API plays a significant role in providing access to and facilitating interaction with large language models (LLMs) from various Salesforce partners such as Anthropic, Google, and OpenAI. It enables applications to leverage these models for various tasks, including text generation and other AI-powered capabilities. As a user, you can configure any Salesforce-enabled model […]

Read More
How to Integrate Salesforce Data Cloud with Amazon Redshift

Companies can finally connect Amazon Redshift to Salesforce Data Cloud without using the ordinary username & password authentication systems ever since its collaboration with AWS has happened. Business owners no longer have to be concerned about managing static credentials or breaching data security. By leveraging Salesforce IDP, companies can easily access their data lakehouse in […]

Read More
Trigger Prompt Templates Using Flow, Apex, or REST API

A prompt template is a pre-designed structure in Salesforce, specially designed to create personalized prompts by filling the substitute with particular details of customers, products, and more. This approach strengthens the creation of prompts and lets teams generate data-driven content. Every time a prompt template is used, it automatically merges the data to create a […]

Read More
Step-by-Step Guide on Adding Opportunity Team Members to Slack Channel

Salesforce allows you to improve communication by effortlessly connecting Opportunity Team Members to Slack channels. This step-by-step blog will show you how to enable Opportunity Teams, configure Slack integrations, and automate the process with Salesforce Flow. Real-time Slack notifications may help you streamline communication, increase productivity, and keep your sales team on the same page. […]

Read More
How to Use Transform Element in Salesforce Flow

Salesforce introduced the transform element in their winter ‘24 release. This feature simplifies data processing in flows by eliminating the need for loops and assignment elements. With the Transform Element, you can seamlessly map source data to target data, making your flows more efficient and easier to maintain. Transform element is available for screen flows, […]

Read More
Our Location worldwide
Indian Flag India
3rd Floor, A-10, Pegasus Tower, Sector 68, Noida, Uttar Pradesh 201301 +91-1203117884
United States of America Flag USA
333 West Brown Deer Road Unit G – 366 Milwaukee WI, USA 53217 +1(262) 310-7818
United Kingdom Flag UK
7 Bell Yard, London, WC2A 2JR +44 20 3239 9428
Canada Canada
HIC Global Solutions INC
43 Lafferty Lane, Richmond Hill, L4C 3N8, CA +1(262) 310-7818