

Managing approvals, updates, and record changes directly from email can significantly improve efficiency within Salesforce workflows. Instead of logging in, navigating records, and manually updating fields, users can simply respond to emails and trigger automated updates using Email Service in APEX.
This approach is especially useful for businesses leveraging Salesforce automation and looking to enhance user productivity through AI and automation-driven workflows. By using APEX Email Services, organizations can capture incoming email data such as subject, sender, and body, and use it to update records in real time.
In this guide, we will explore how to implement Email Services in APEX, along with a practical use case that demonstrates how Salesforce records can be updated directly through email replies.
What is Email Service in APEX and Why It Matters
Email Service in APEX allows Salesforce to process incoming emails automatically using custom APEX classes. It acts as a bridge between external email communication and internal CRM data updates.
This functionality is particularly valuable in scenarios where quick actions are required without forcing users to log into Salesforce. It supports automation by extracting key details from emails and using them to perform actions like updating records, triggering workflows, or processing approvals.
It will save time of login and redirection of record and then fill and save. To fetch details of replied Salesforce email like from Address, Subject, Body of Email, we will use Email Service in Salesforce.
The case example: We have sent an approval email from APEX to users, now users can approve or reject the approval from email only.
OR
I have sent an email from APEX to user with empty table in its body like below:
| Category | Revenue (Fill Amounts) |
Profit Margin |
|---|---|---|
| Electronics | ||
| Services | ||
| Maintenance | ||
| Spare Components | ||
| Services | ||
| Total |
And now, we want to fill in details on record by replying to the email directly. Below is the entire process of how the Email Service works and the complete implementation of how to send email and get a reply of that sent email:
Step-by-Step Implementation of Email Service in APEX
To implement this functionality, a structured approach is required, starting with creating an Email Service class and ending with sending emails that trigger the service.
Step 1: Create an Email Service class like below example:
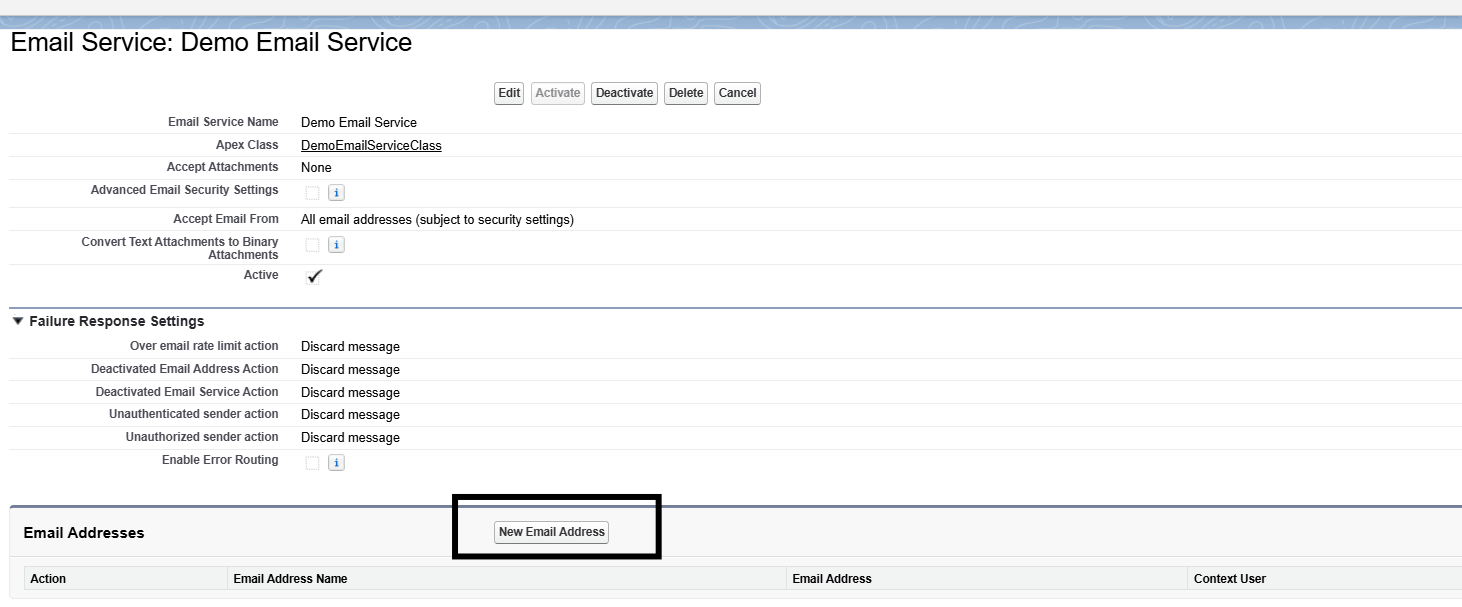
Step 2: Create Email Service now.

Just fill in the required fields.
After saving this Email Service class, you will get an option to add Email Address, add the required email address as below:
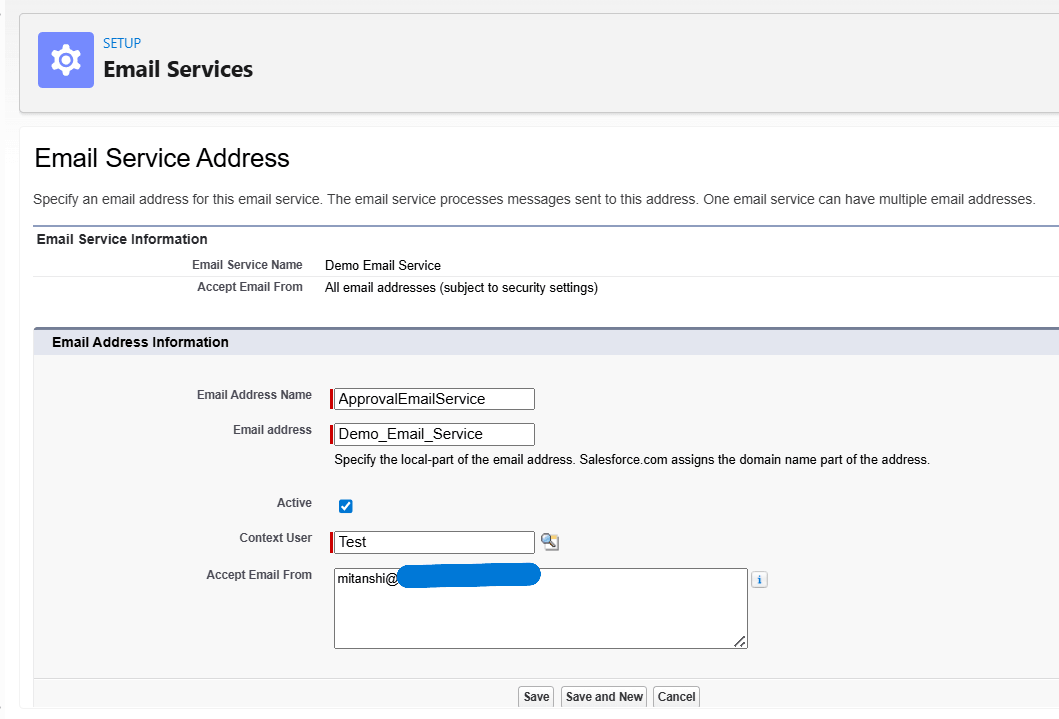
NOTE: You may leave the ‘Accept Email From’ field blank to accept email from any domain.
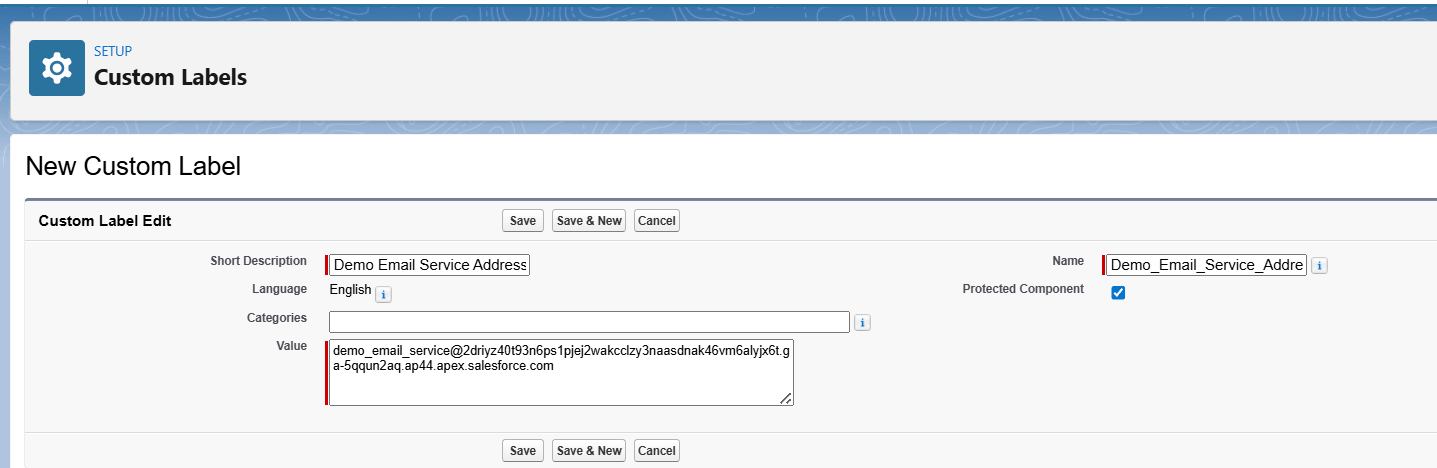
Now, the email address has been generated.

Store this address somewhere, so that it can be easily used in APEX class. Create a custom Label to store this address like below.
Step 3 : Now create a class to send an email to the owner or any required user of Opportunity to fill the field ‘Next Step’ from email itself only.
To trigger your Email Service APEX class, you have to use the setReplyTo() method of Messaging.SingleEmailMessage.
NOTE: In Subject you can add any field that is unique like AutoNumber field, etc., to specify and fetch the record further to perform actions on it (as an example I am using Id for now).
In Body and Subject, you can use Email Template for better, clear picture and reusability (We have used hardcoded body/subject here just for an example).
The flow of the entire process is like : Opportunity Record Updated with Stage → Email sent to required user —> user replied to email with Next Step message → The message he sent in email has been updated in the Field ‘Next Step’ of Opportunity.
That’s how the email service works.
To extend this implementation further, you can explore how the Email Services Apex Class in Salesforce: Contact Handling and Extraction works in detail, enabling more advanced parsing, contact identification, and data processing directly from incoming emails. This approach helps build more robust and scalable email-driven automation within Salesforce.
No Data Found.

 India
India  USA
USA UK
UK Canada